Intro
In this blog post, I discuss how to save a PDF document to a SharePoint Document Library, with some of its content previously extracted via AI, and saved in a JSON file, that will populate multiple Document Library columns using Power Automate. Imagine we receive these documents and possibly other files via email from the AI service. One such service is Extrakt.AI, which you can find here at www.extrakt.ai.
I’m going to use a law firm or legal department as an example where contracts are sent to the AI service to extract specific information within the contract document. This includes the Contract Number, Date of Signing, Contract Signed by Vendor, and Contract Signed by Customer.
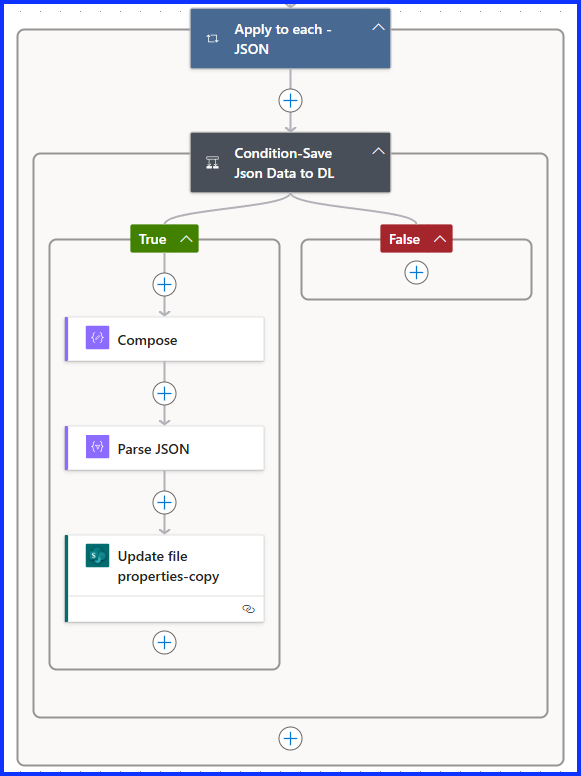
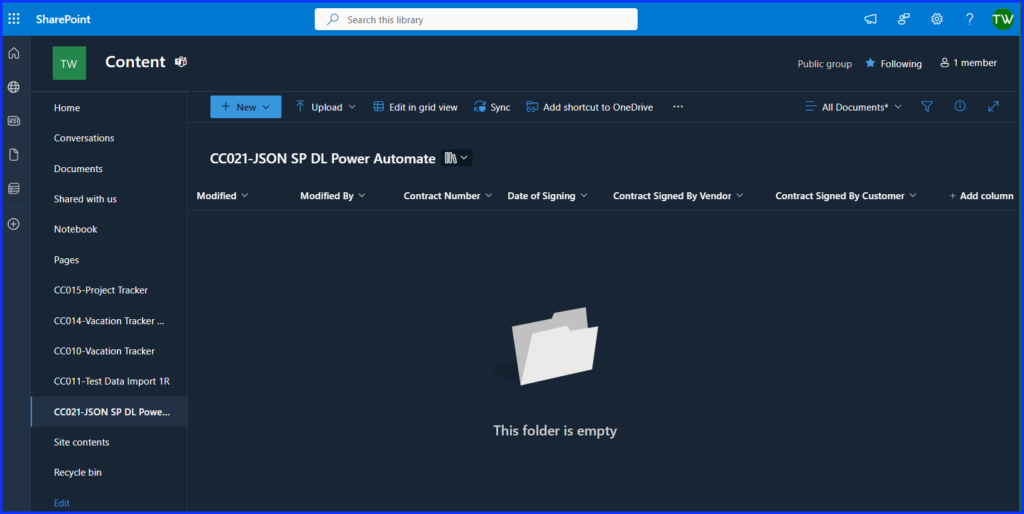
Here is a look at what we are going to build today

SharePoint Document Library Setup
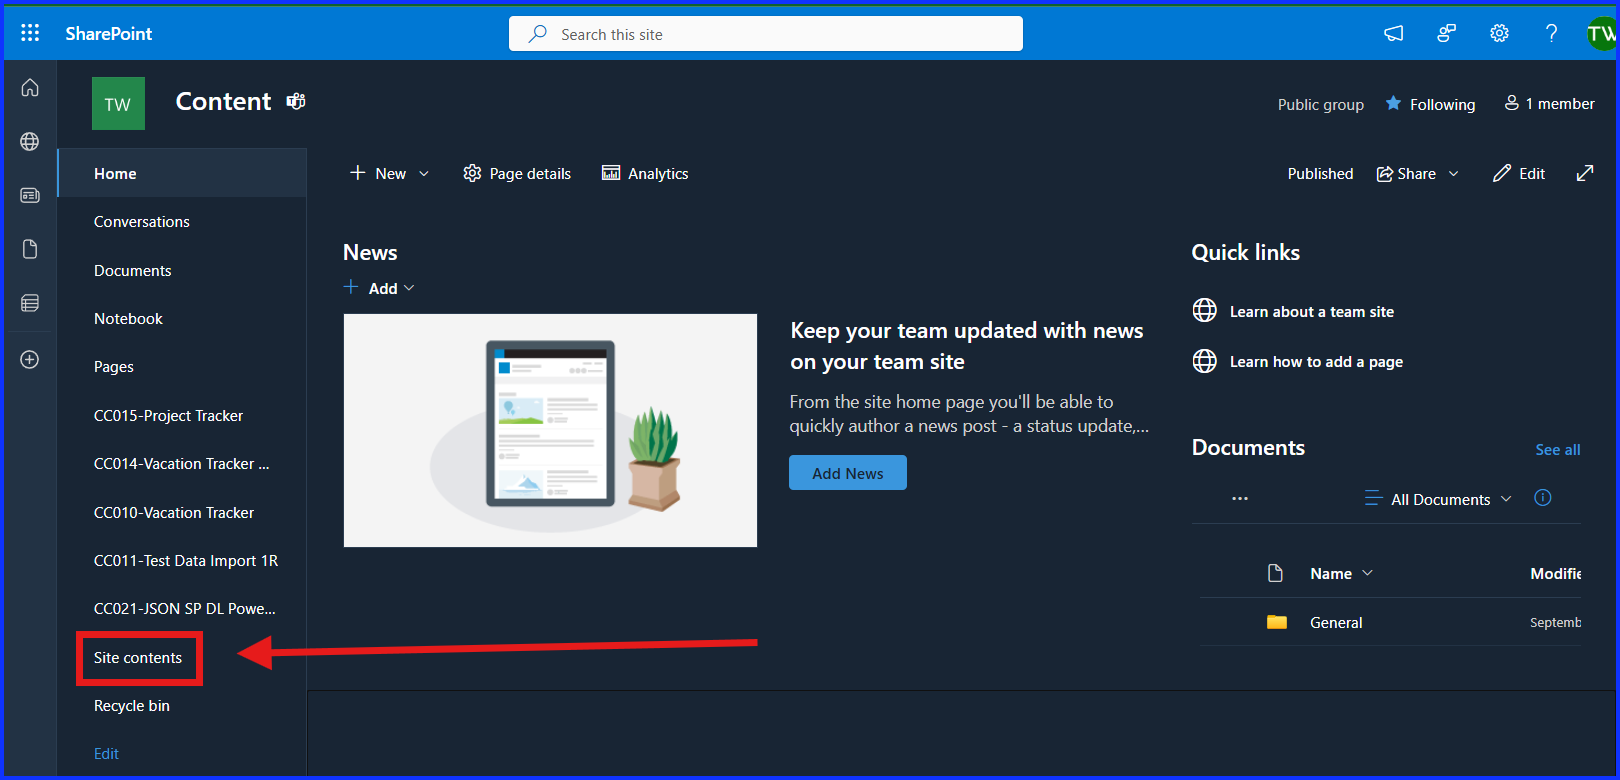
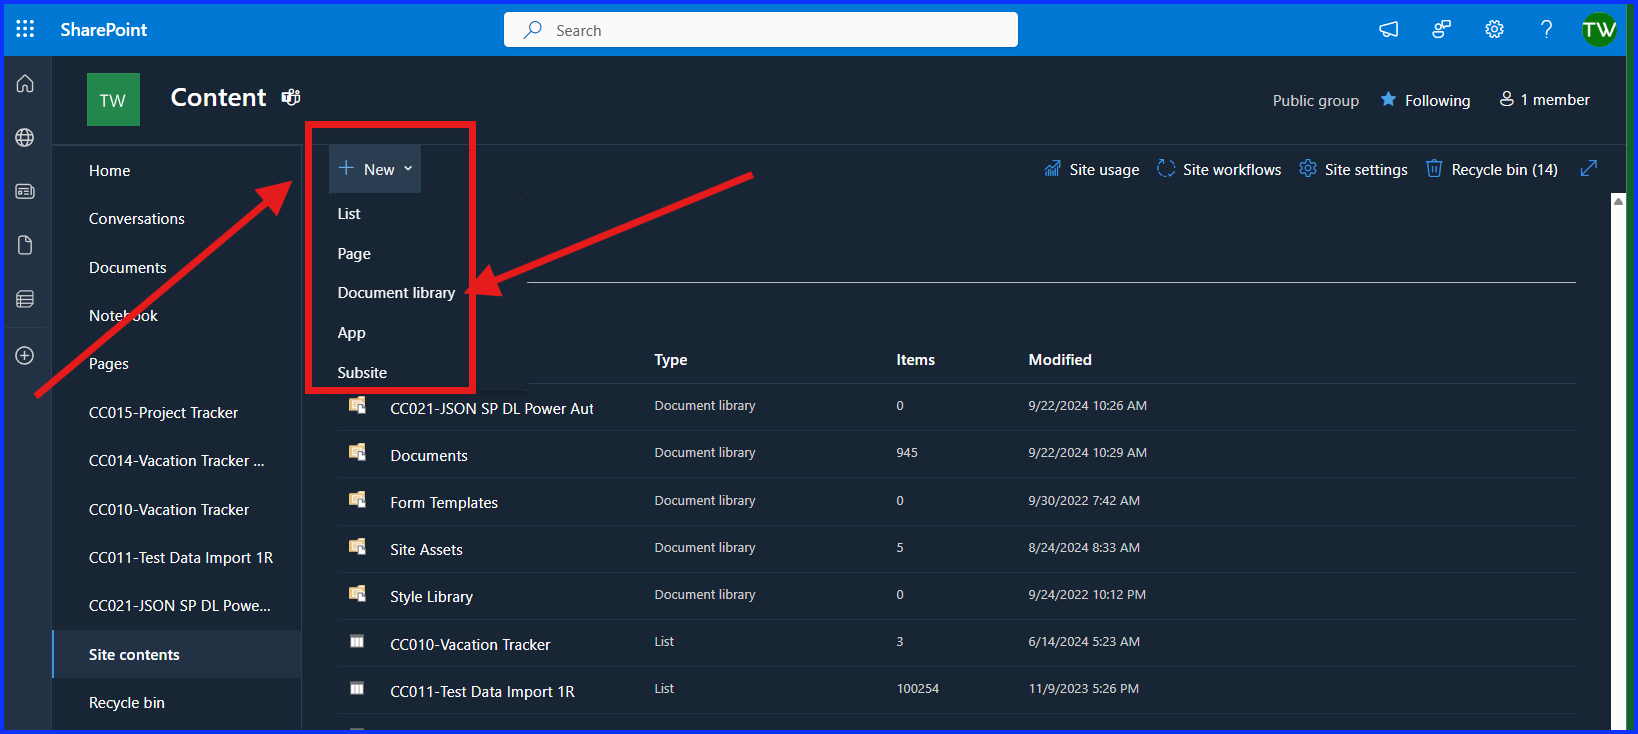
The first step is to create the Document Library in SharePoint. To do this, go to your SharePoint site, then to your navigation pane, and click on “Site Contents”. From the Site Content, click on “New”, then on “Document Library”, give it a name and hit “Save”.
Now, scroll to the far left of the Document Library’s columns and click on “Add Column”. Select the column type. To learn more about column types, click here. It’s important to make sure the data going into the column match the column type. If you’re not sure, the “Text” option is the least risky as it can include any type of character.
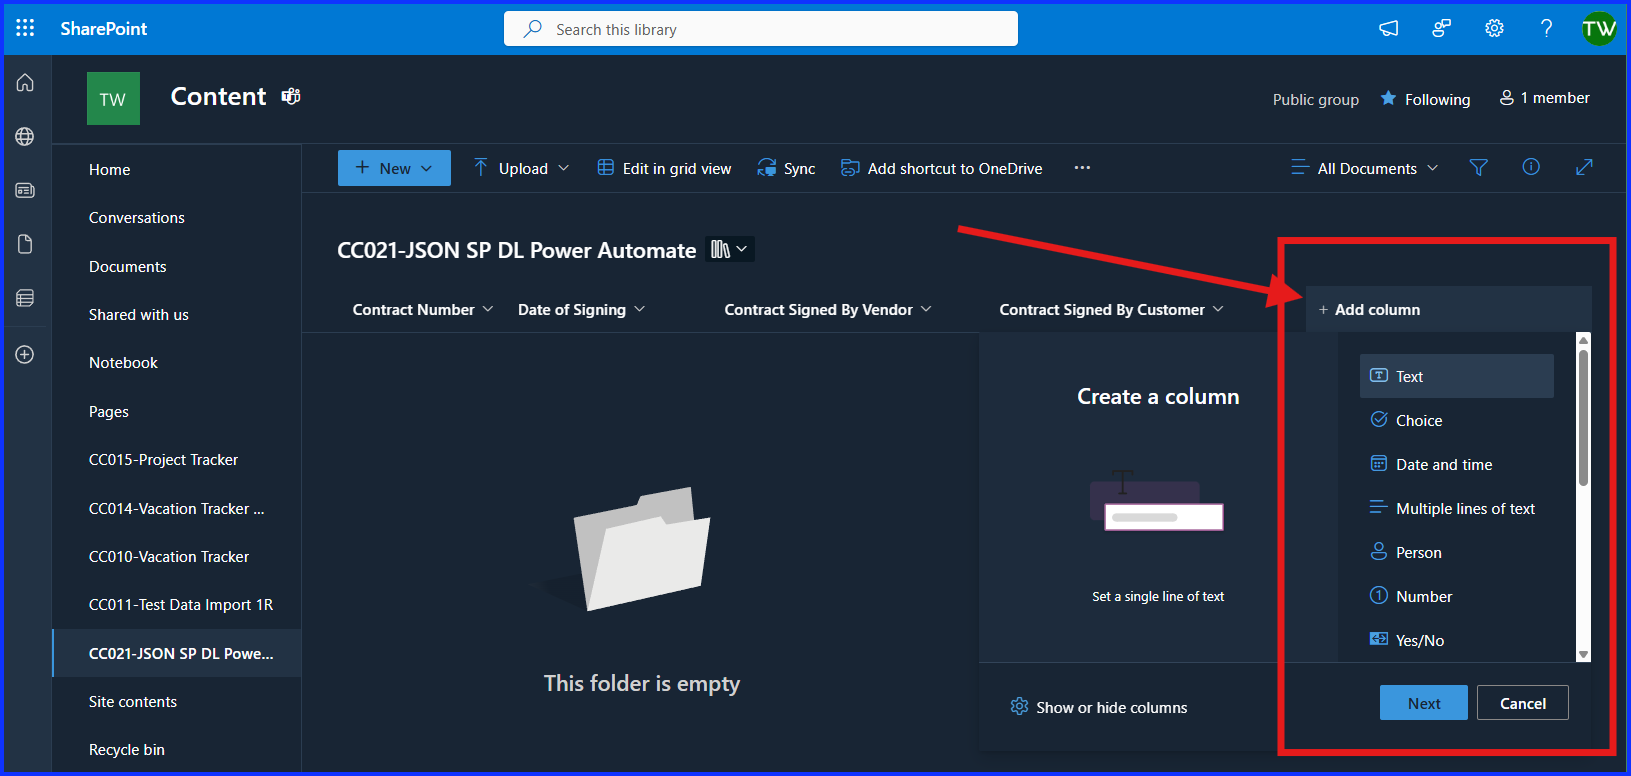
For this example, I’m creating four columns related to the contract information from the contract file that will be saved here. The columns names are Contract Number, Date of Signing, Contract Signed By Vendor and Contract Signed By Customer. All columns are of type “Text”.
The Flow
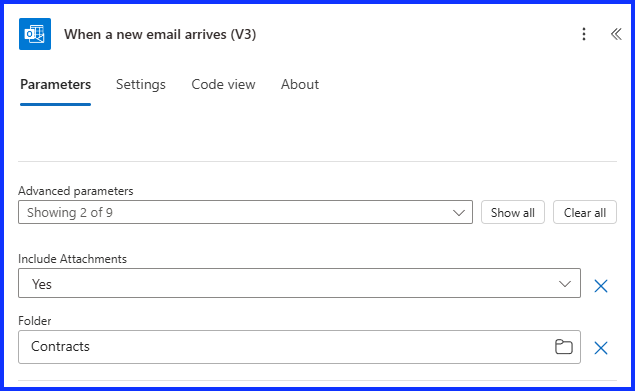
When a New Email Arrives Action
I have a rule setup in Outlook to move emails received from the AI service to a folder called “Contracts”. The flow is triggered when a new email arrives in that folder. The email we receive from the AI service has only one PDF and one JSON file but can have other files with other file types.
Initialize Variable Action
I’m using a variable to store the location of the PDF file in the document library. The location is tracked by the item’s ID. To use a variable, it must be initialized first, to do so select the “Initialize Variable” action, give it a name, I’m using the name “PDFFileID” and in this case, select type “Integer”.

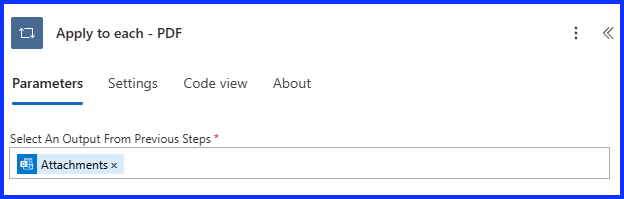
Apply to Each – PDF
This is the first of two “Apply to Each’s” and is used to cycle through all the file attachments and identity the PDF file. You must do the PDF first in order to get the SharePoint location ID, which we need when adding the info from the JSON file. Add the “Apply to Each” action and select the “Outlook attachments” from Dynamic Content.
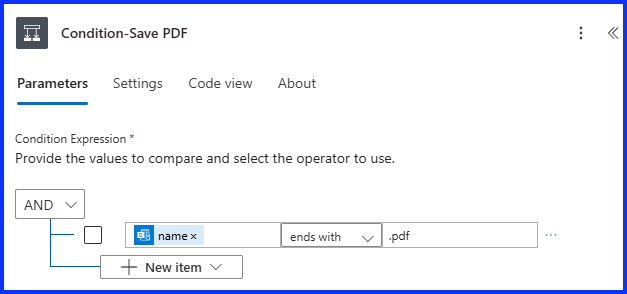
Condition – Save PDF
Next, add a “Condition” action, in Dynamic Content, select “Attachments Name”, then “Ends With”, then “.pdf”. Make sure to include the period. This action will identify the PDF file.
Create File
Under the “True” condition, add the “SharePoint Create File” action. Select the SharePoint site you are using and folder path, it will be the root if there are no folders. Under “File Name”, select “Attachment Name”. Under “File Content”, select “Attachments Content”. This action will save the PDF file in the Document Library.

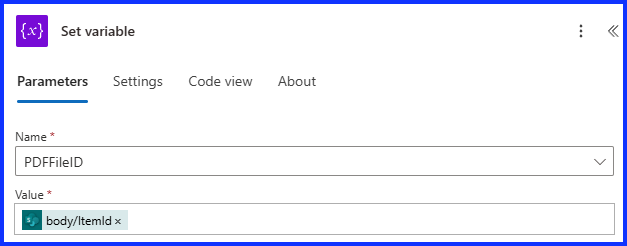
Set Variable
Now that our PDF file is save to the Document Library, it’s time to grab the file location ID. Add the “Set Variable” action, select the variable, in my case it’s PDFFileID. Under “Value”, select Dynamic Content, add the “body/ItemID” from the “Create File” action.
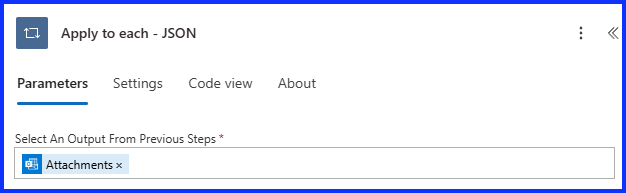
Apply to Each – JSON
Next add a second “Apply to Each” action, this will be used to cycle through the attachments again, this time looking for the JSON file. Under “Outputs”, select Dynamic Content and choose the “Attachments” from the “Outlook” action.
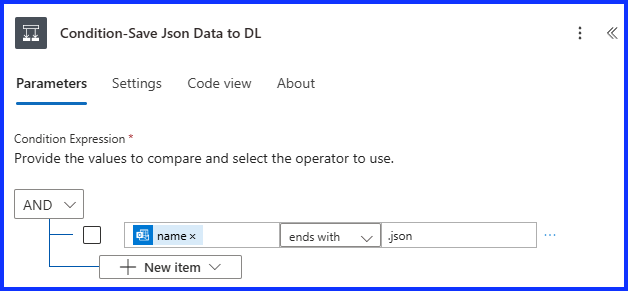
Condition – Save JSON Data to Document Library
Add a “Condition” action, under Dynamic Content, select the “Attachment Name” from the “Outlook” action. Next, select “Ends With”, and lastly write in “.json”. This action will look through all the attachments and identity the one when the name that ends with .json.
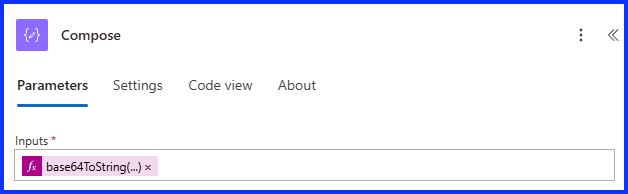
Compose
Next create a “Compose Action” and under it’s input’s add this expression:
base64ToString(item())?[‘ContentBytes’])
This will convert the JSON from base64 to a string which is needed in order to perform the next action.
Parse JSON
Now that the JSON data has been converted to a string, it is ready for the “Parse JSON” action. Add this action underneath the “Compose” action. Under the “Content field”, use Dynamic Content, add the “Output” from the “Compose” action.
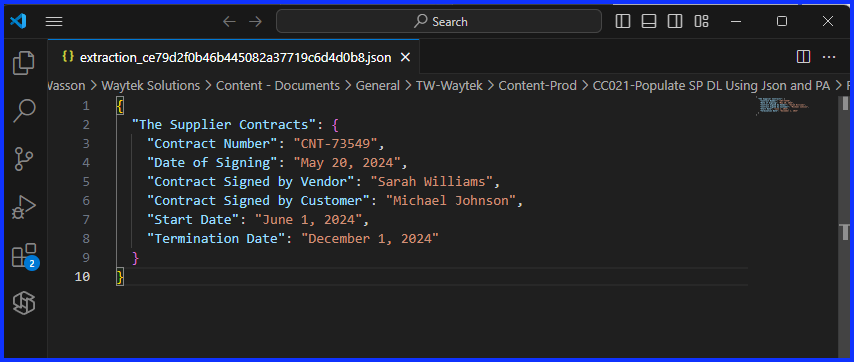
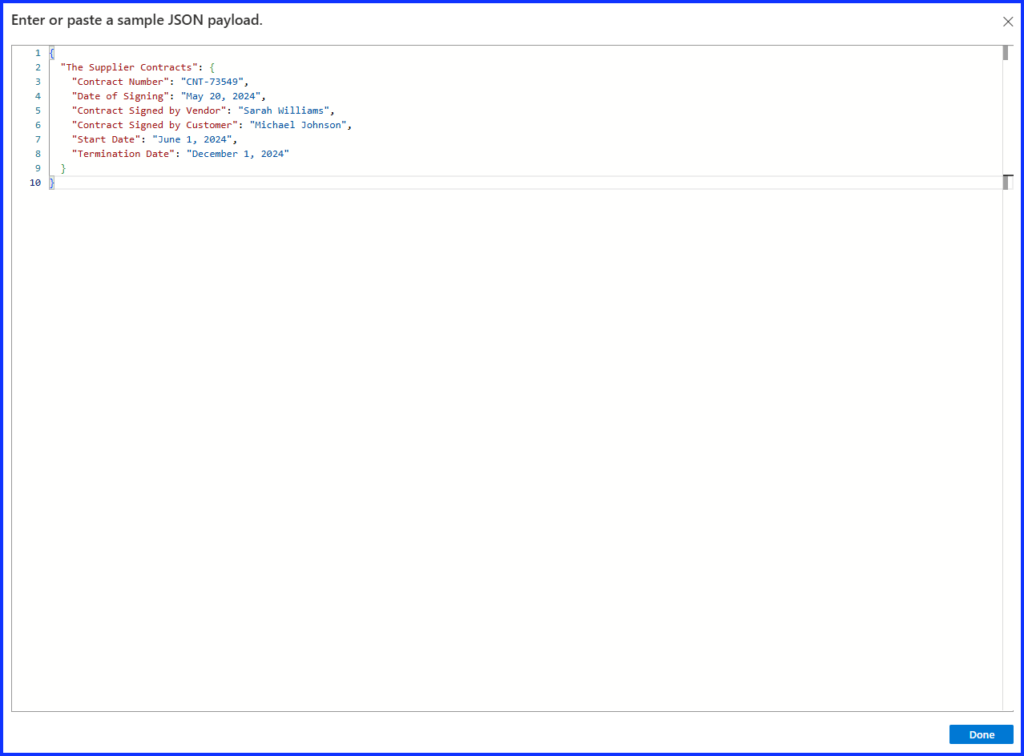
At the bottom of the “Schema Box”, click on “Use Sample Payload to Generate Schema”, this will open a new window. Copy the contents of your JSON file and paste it starting on row one. Then click on “Done” and now the JSON schema should be generated. I used VS Code to open the JSON file, Notepad will work as well.

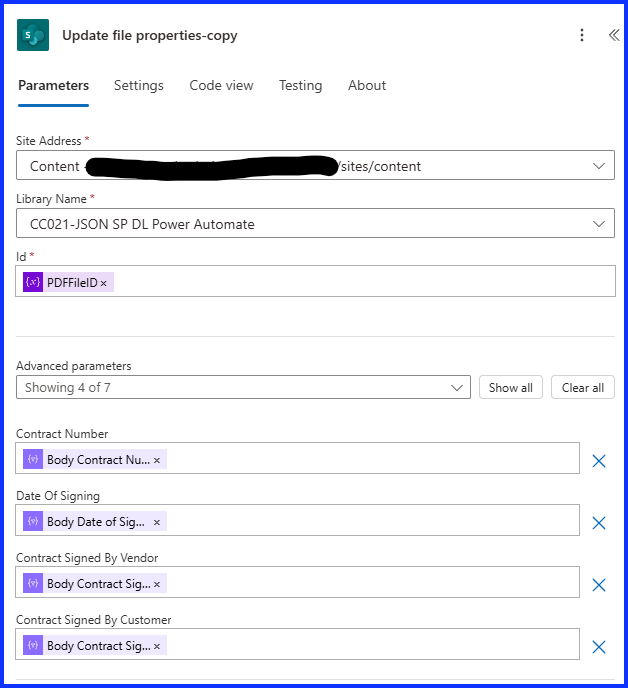
Update File Properties
For the last step, add the “Update SharePoint File Properties” action. Under “Site Address” add the site where the document library is, under “Library Name” add the name of the Document Library. For “ID”, under Dynamic Content, add the Variable you used to save the location ID.
Under “Advanced Parameters”, you should see the column names from the Document Library, if not click on “Show All”. For each column name select Dynamic Content and the corresponding name under the Parse JSON action.
End Result
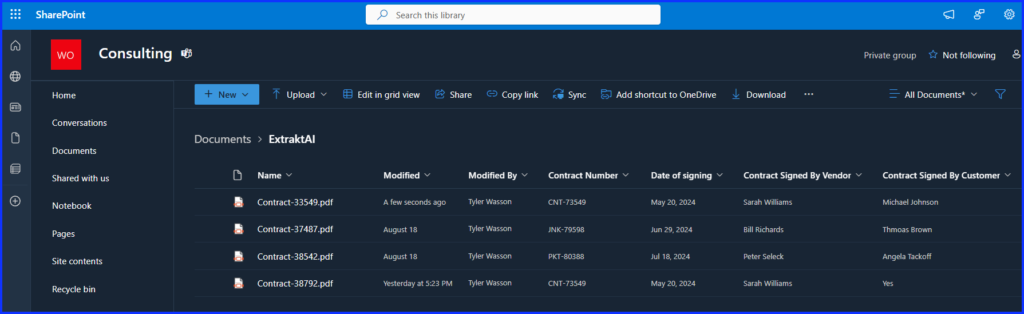
After multiple runs through the AI Service, you can see what the Document library now looks like. The PDF files are saved, and the added columns are populated with key meta data pulled from the contracts. There are many business scenarios where this could improve business processes by reducing manual data entry.
After doing this post, I did a webinar with Extrakt.AI using their service with my flow. Click on the link below to see the entire video: