Intro
I’m part of a team who manages an Azure SQL database with over 300 tables and 30 GB of data as part of my role as Power Platform Developer at my current contract. We looked at several different backup options and decided to import the entire database into a different Lakehouse by running a daily pipeline in Fabric. We have seven different Lakehouse’s, one for each day of the week and each are overwritten every week.
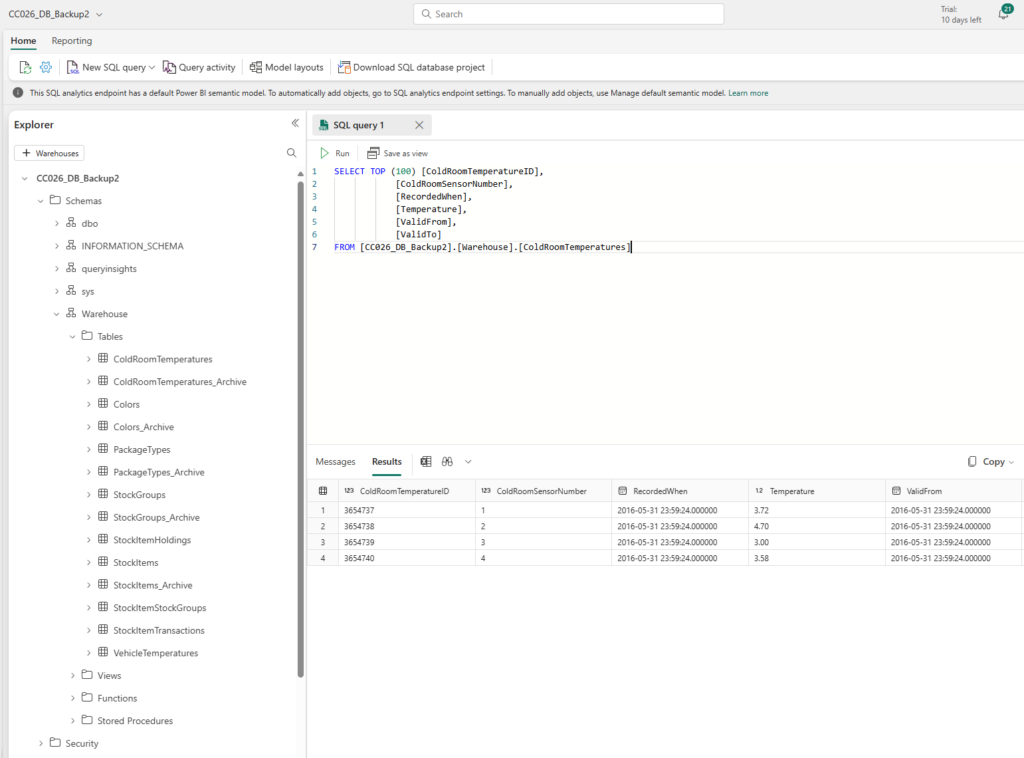
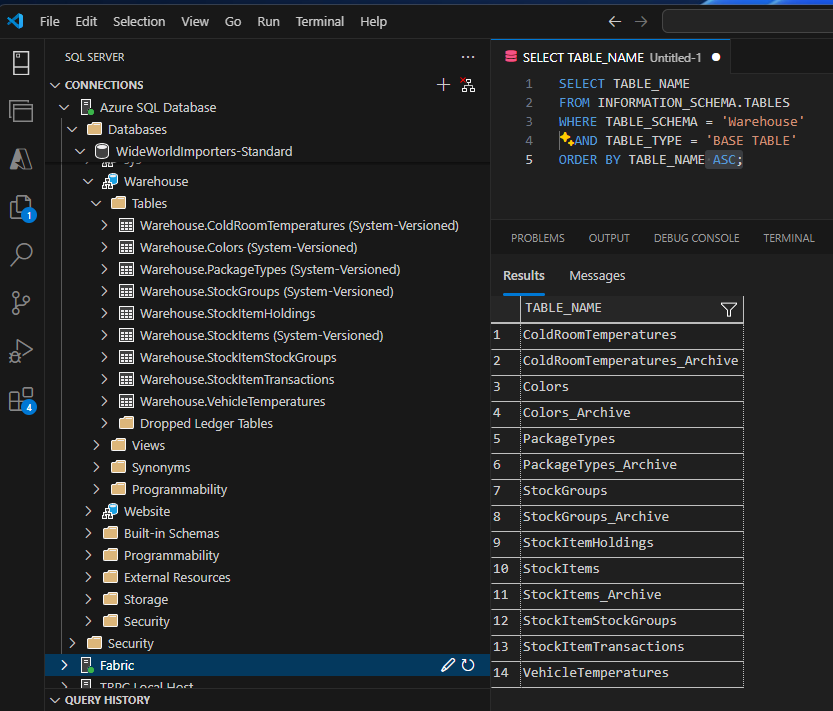
For this blog post, I’ll demonstrate how to set this up using a sample Azure SQL database called Wide World Importers (shown below) and copy it into one Lakehouse. You should be able to easily replicate the process out to seven days or more and no matter the size of the database.
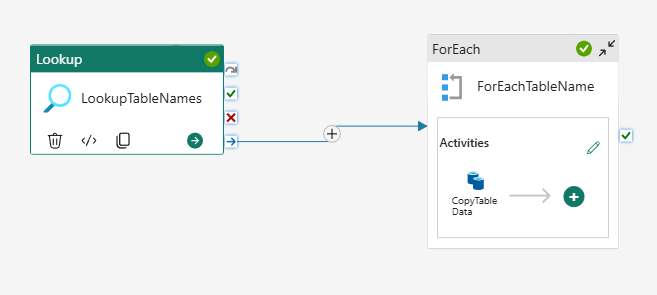
Below is what the pipeline looks like and what we are going to build.
Check out my YouTube video based on this blog post:
Create New Lakehouse and Data Pipeline
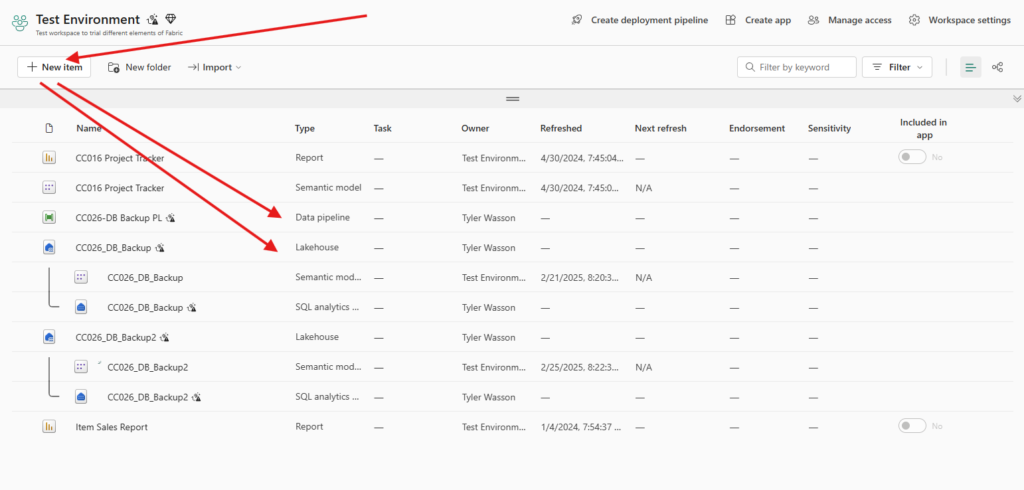
If you do not already have a Lakehouse, go to your Fabric environment and select the New Item button and scroll down to the Lakehouse option. Give your Lakehouse a name and that’s it. Then do the same thing but this time select the Pipeline option, give it a name and open it.
Create a Lookup Activity
From the Home menu select the Lookup activity.
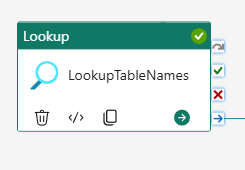
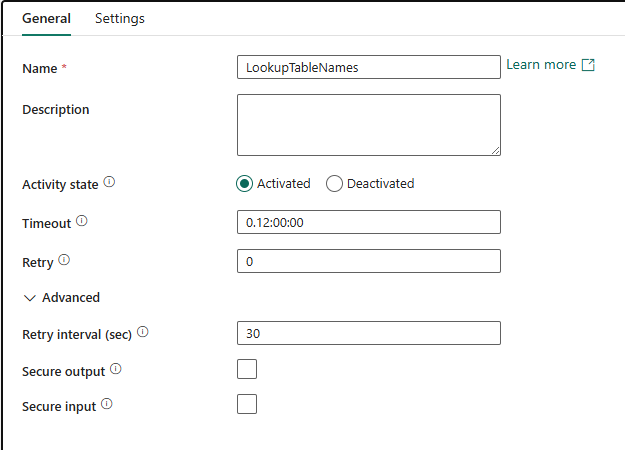
Below you should see two tabs, General and Settings. Under the General tab, give the Lookup activity a name. I named mine LookupTableNames. By default, the Activity State should be set to Activated.
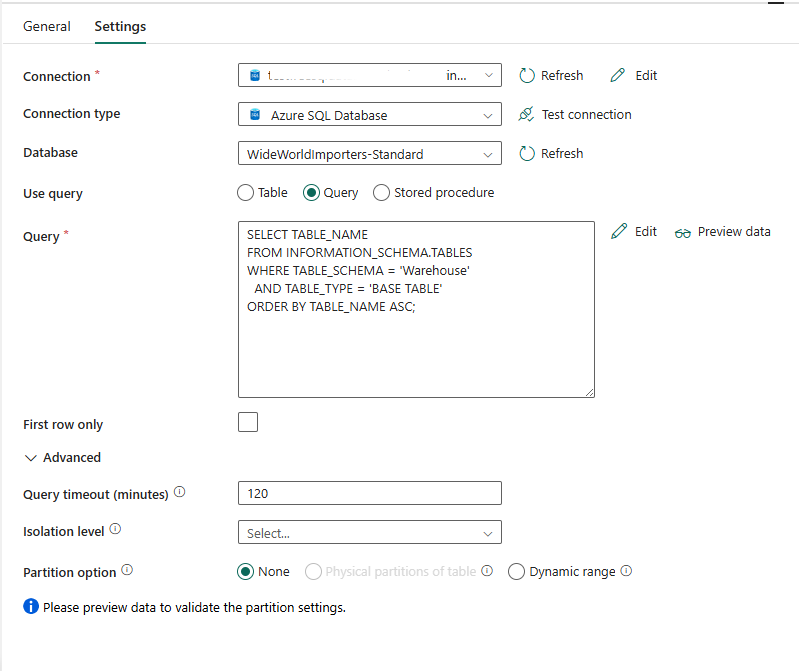
Next, go to the Settings tab, here you will be selecting the tables you will be looking to backup.
- Connection: provide the link to your Azure SQL Server
- Connection Type: select Azure SQL Database
- Database: select the name of the database you want to backup
- Use Query: select Query and provide the SQL script below. Warehouse is the name of the database schema I want to backup; you can change this accordingly. See the picture gallery below for each step.
SELECT TABLE_NAME
FROM INFORMATION_SCHEMA.TABLES
WHERE TABLE_SCHEMA = ‘Warehouse’
AND TABLE_TYPE = ‘BASE TABLE’
ORDER BY TABLE_NAME ASC;
Create a For Each Activity
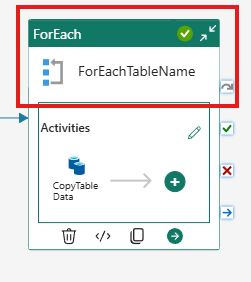
Next, from the top menu select Activities and then ForEach. Below, under the General tab give your ForEach activity a name and make sure the Activity State is activated.
Under the Settings tab, click on the Items field, this should open up an expression builder. Under the Activity Outputs parameter, select the name of your Lookup activity. Mine is LookupTableNames. This will populate the expression builder. After the word output add a .value to it. The full formula is written out below. See the picture gallery below for a picture of each step.
@activity(‘LookupTableNames’).output.value
You will not see any items under the Activities tab until you add the Copy Data activity.
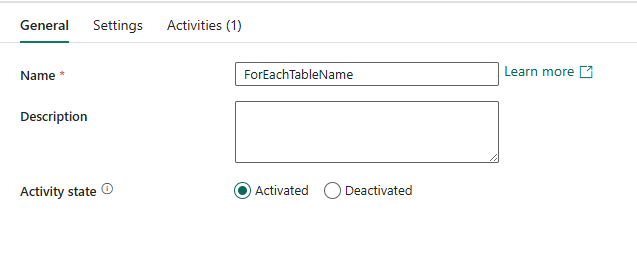
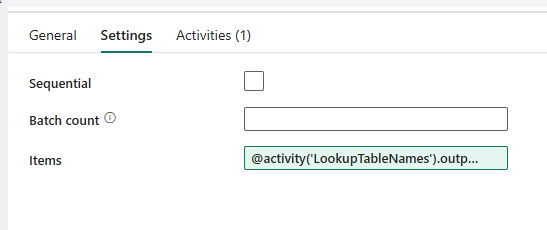
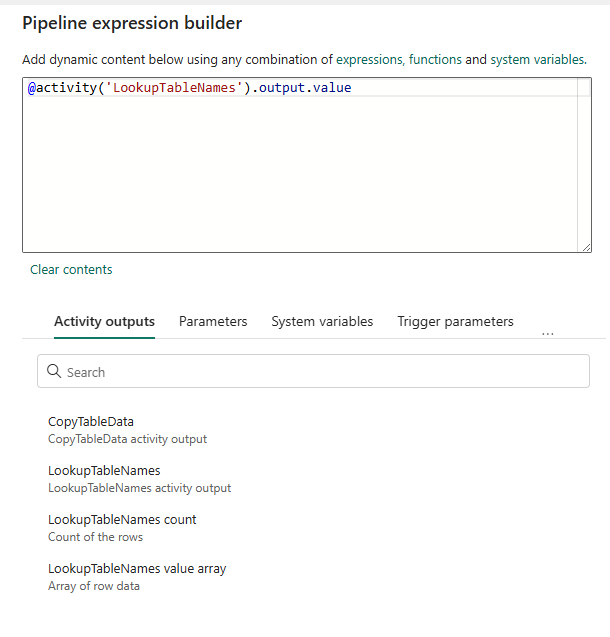

Connect the Lookup Activity to the ForEach Activity
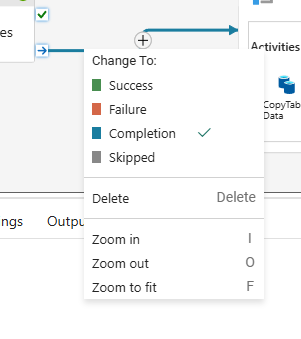
Next, you will link the Lookup activity with the ForEach activity by selecting the arrow (completion arrow) on the Lookup activity and dragging it to the ForEach activity. If you initially didn’t select the Completion Arrow, you can right click on the connector and change the option to Completion (shown below). No other changes to the connection are required.
Add a Copy Activity
Next you will add a Copy Activity by selecting the plus button inside the ForEach activity.
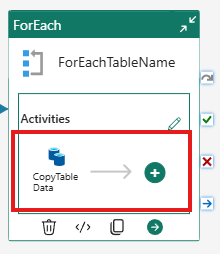
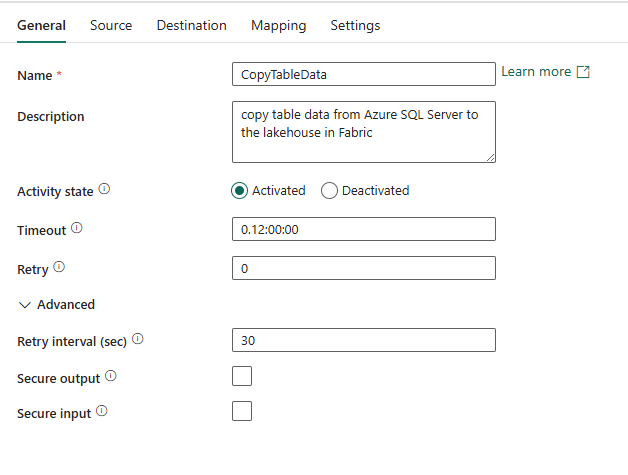
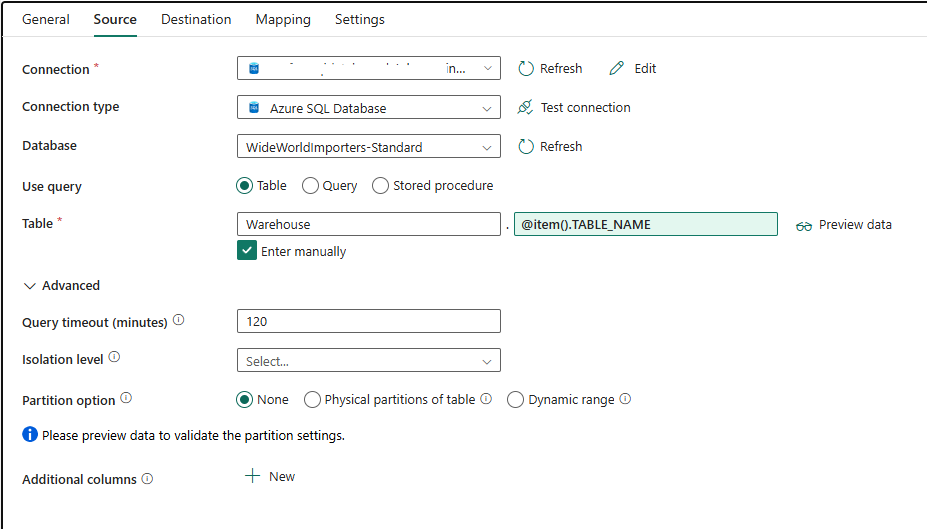
Below, under the General tab give you Copy activity a name and make sure it’s activated. Under the Source tab re-enter the Azure SQL Database Connection, Connection Type, and Database name the same as you entered under the Lookup activity.
- Use Query: select table
- Table: select “Enter Manually”
- In the first field enter the database schema you want to backup, mine is Warehouse
- For the second field, click on it to open the expression builder and under the ForEach iterator select the ForEach activity. After the @item() add .TABLE_NAME. The full expression is below. This will iterate through all the table names in the table based on the select query in the Lookup activity.
@item().TABLE_NAME
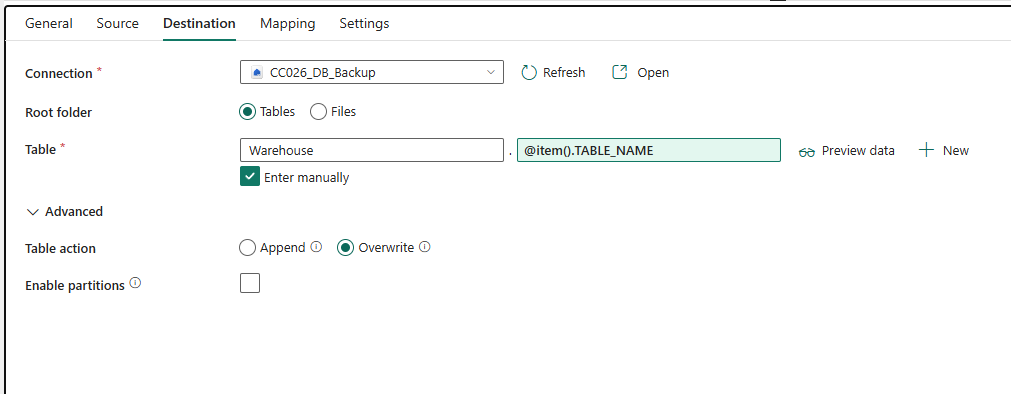
Next, under the Destination tab, for the connection select the Lakehouse to backup the database too.
- Root Folder: Tables
- Table: select “Enter Manually”
- In the first field enter the database schema you want to backup, mine is Warehouse
- For the second field, click on it to open the expression builder and under the ForEach iterator select the ForEach activity. After the @item() add a .TABLE_NAME. The full expression is below. This will add all the table names in the table to the Lakehouse.
@item().TABLE_NAME
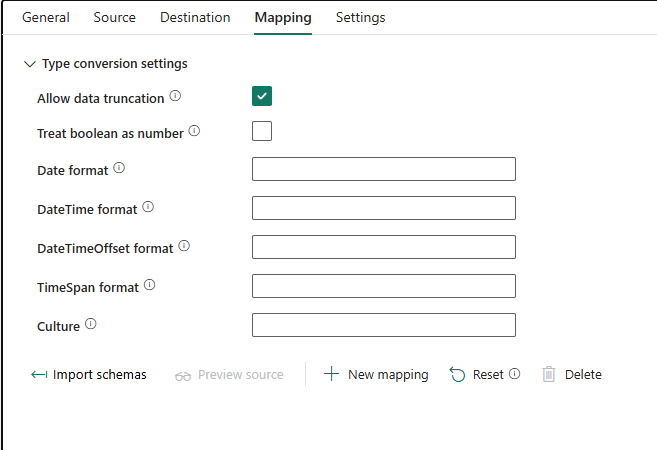
Next, under the Mapping tab, select Type Conversion Setting and select Allow Data Truncation if it’s not already selected.
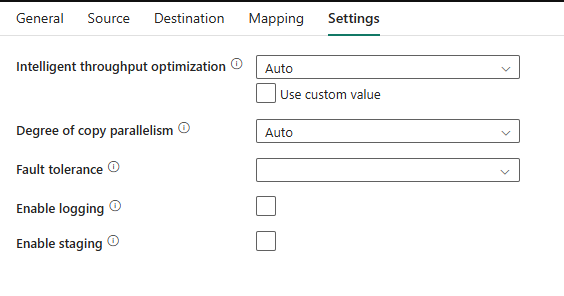
No other setting updates are required, and you are ready to run the pipeline. See the picture gallery below for each step.
Run the Pipeline
On the main menu select the Run tab and the select run. The pipeline should begin to run and iterate through the different steps in the pipeline.
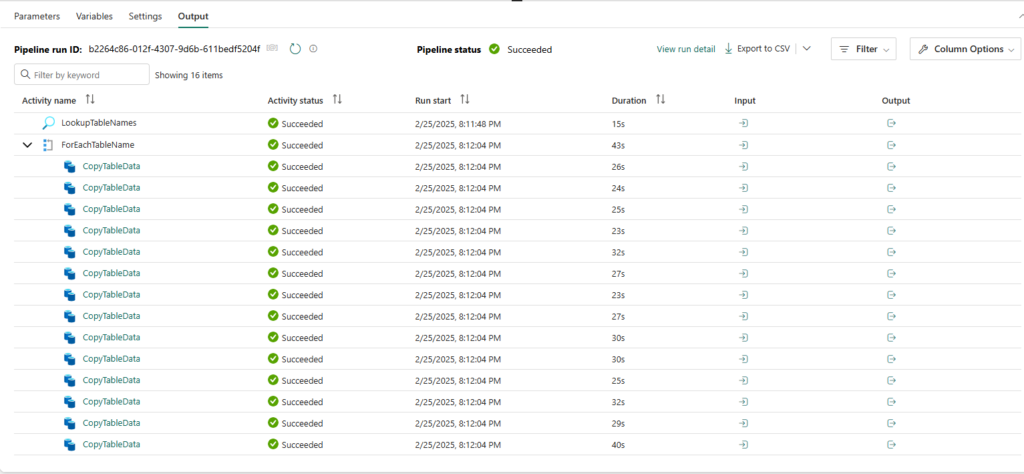
You can go to your Lakehouse and see the tables that were imported.
