Intro
I wrote a post not that long ago demonstrating how to create project status reports from a SharePoint List using Power BI (click here to go to that post), and in this post, I will show two examples on how to view the SharePoint User Lookup field in those Power BI Reports.
The below image shows the SharePoint List with two People Choice fields where you can select users from your Microsoft 365 tenant.
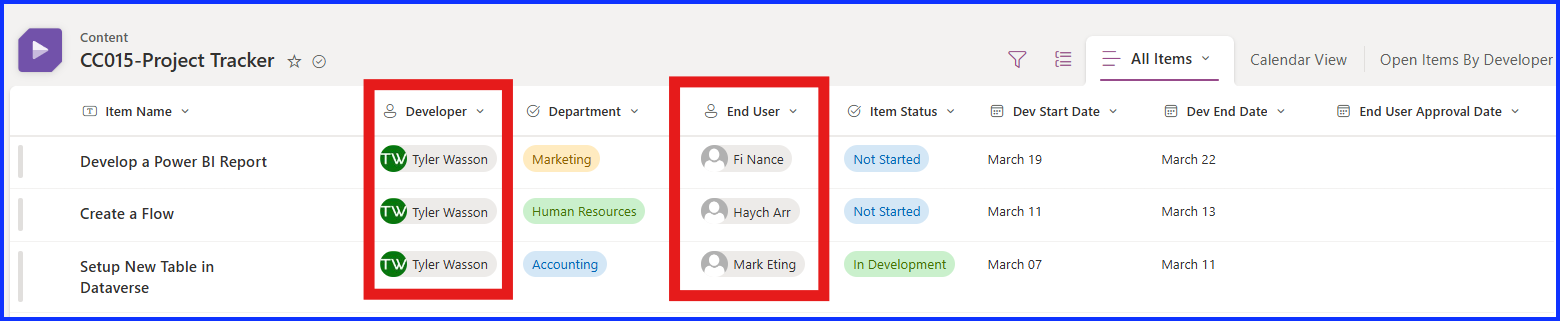
When you import the SharePoint List table into Power BI, the values from those fields show [List] instead of the actual value. This means the values are stored in another table.

Example 1: Update Existing Table
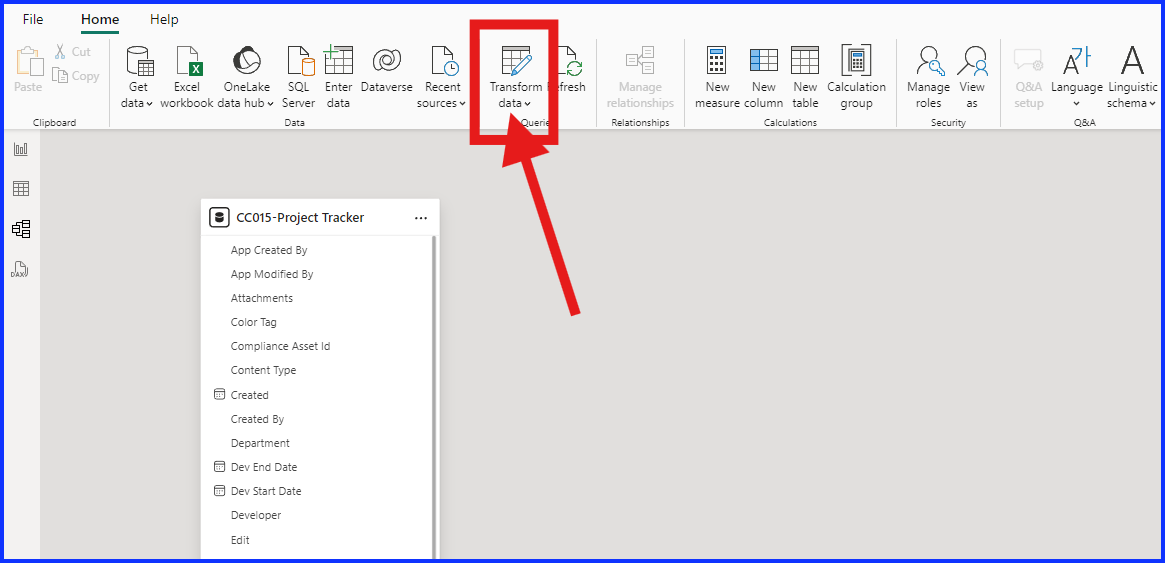
The first example is a full solution without actually bringing in the SharePoint User table, if you are only interested in the user’s full name than this option is all you need. From within the Power BI Desktop application, from the Home Menu, look for the “Transform Data” button and select it. This will open “Power Query” in a new window.
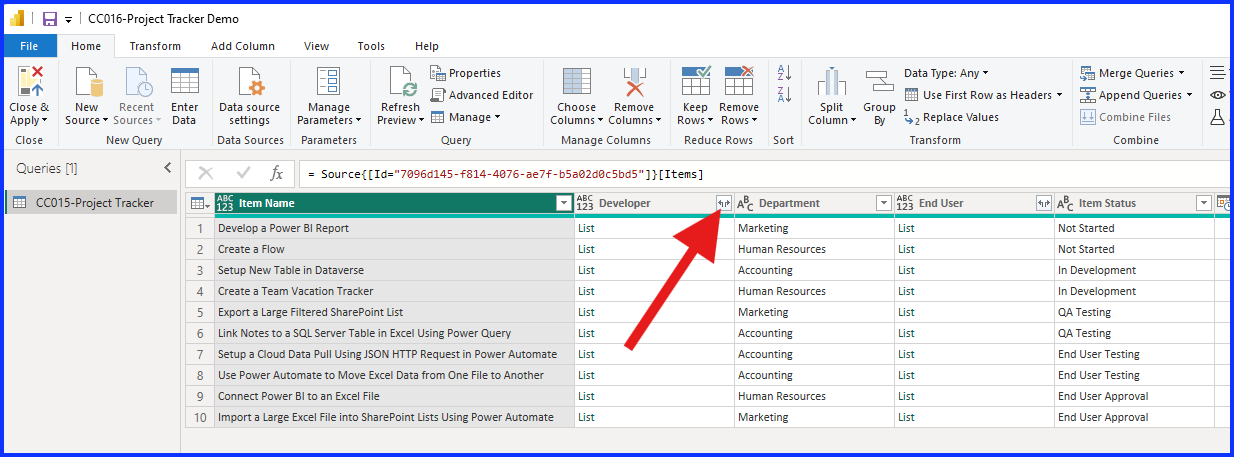
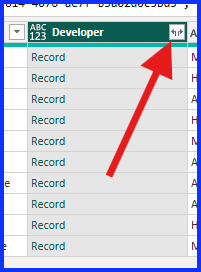
Look for the column with the People’s Choice values and click on the two arrows. In my case it’s the Developer and End User columns.
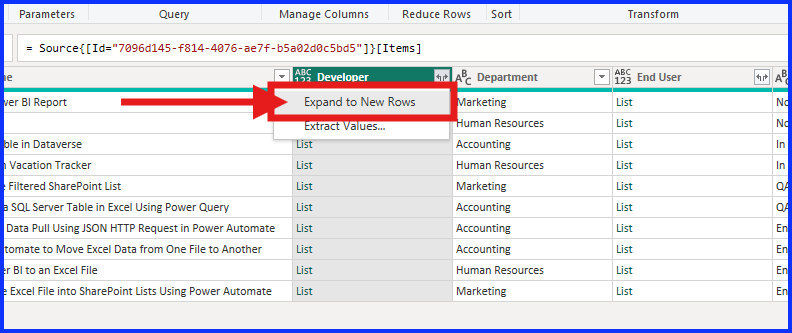
Select the “Expand to New Rows” option from the dropdown.
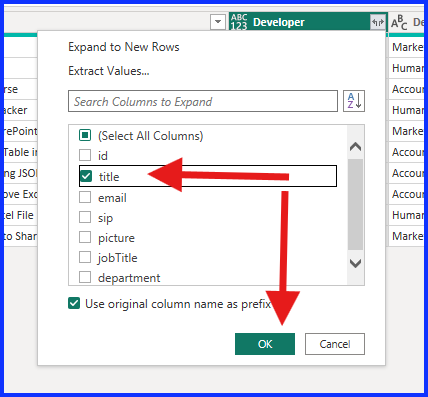
The values in the Developer column should have changed from List to Record, now select the two arrows button again.
In this next step, unselect all of the columns in the drop down except for “Title” and click “OK”.
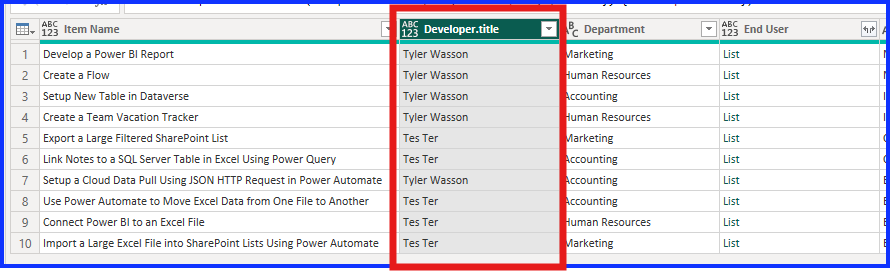
You should now see the user names in the Developer columns.
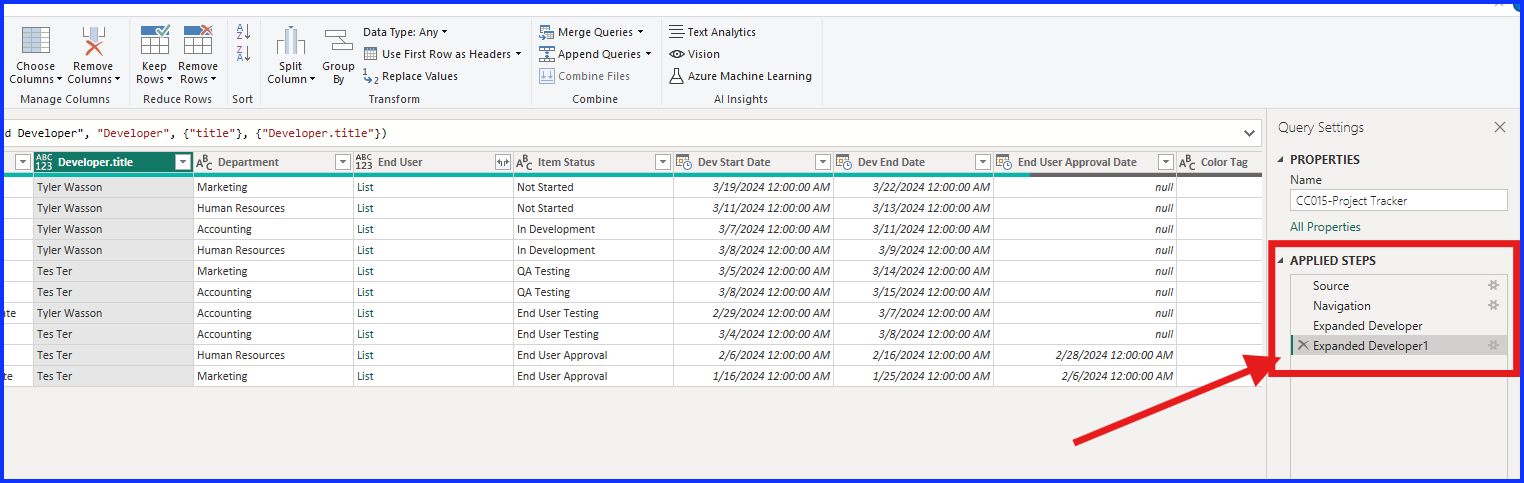
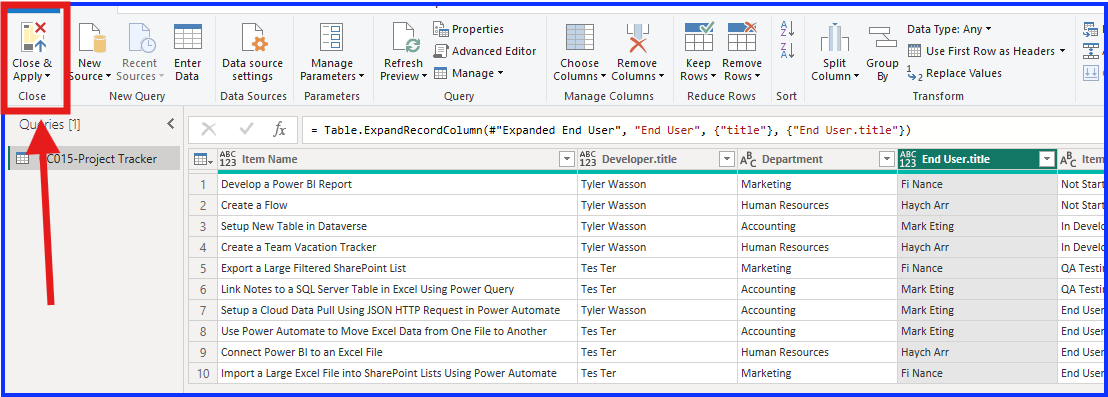
If you think you did something wrong, and need to go back a step or two you can remove or update your changes in the “Applied Steps” tracker in the far left of the window and redo them. If everything is satisfactory, click on the “Close and Apply” in the upper left of the Home menu. This will close “Power Query” and take you back to Power BI Desktop. You are now ready to add the user names to your reports.
Example 2: Connect to Users Table
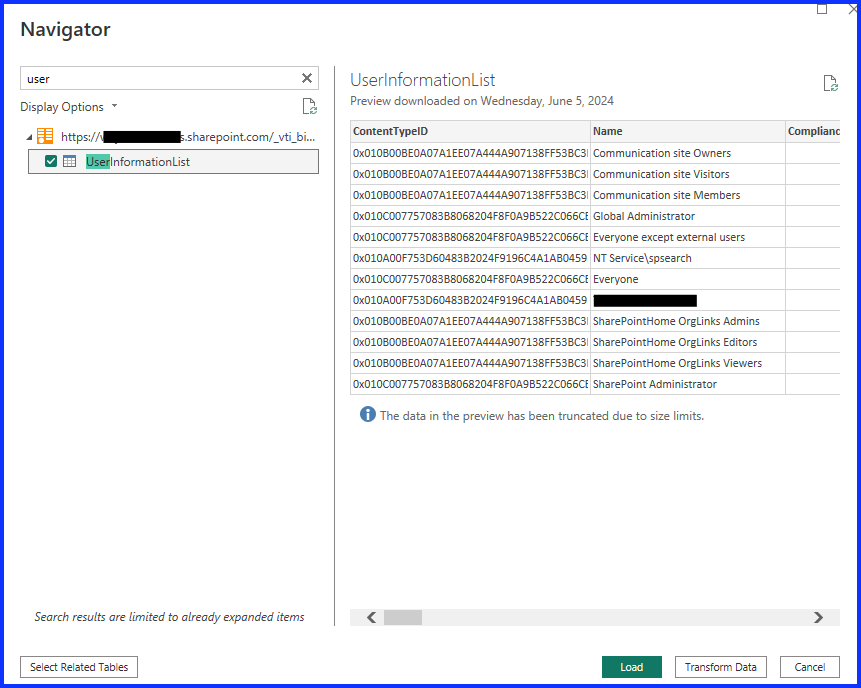
If you need additional User attributes you can create a relationship with the SharePoint site user table. You will need to complete Example 1 before starting Example 2. We are going to add the SharePoint table “UserInformationList”. To add a new table, you can see the previous post (click here to go to that post).
In this case, go to Get Data, OData Feed and enter the url: https://sharepointsitename.sharepoint.com/_vti_bin/listdata.svc (change sharepointsitename with the name of your sharepoint site) then select OK. Search for and select UserInformationList then click on “Load”.
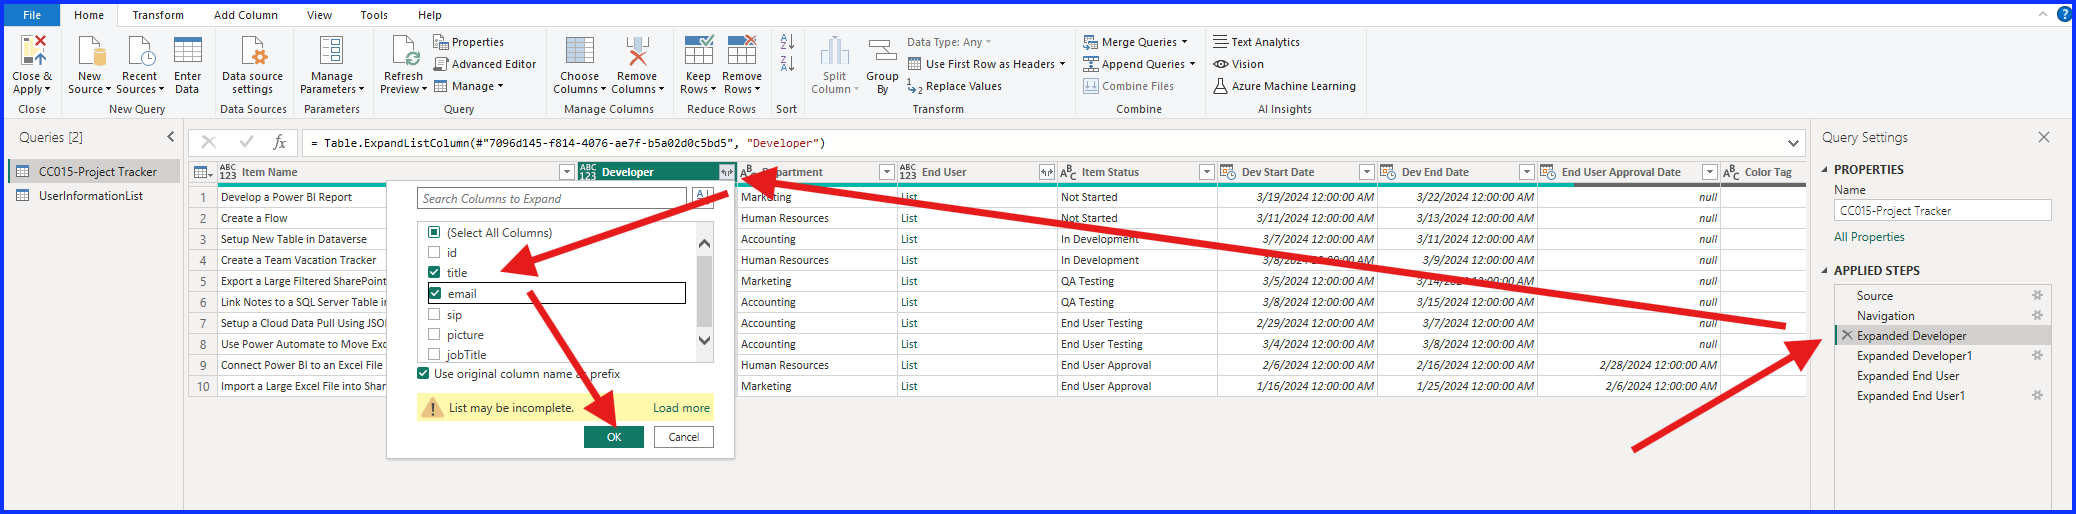
Next click on Transform Data in the Home menu and from the Project Tracker table, go to “Applied Steps” and click on “Expanded Developer”. Then go to the Developer column in the table and select the two arrows next to the title. Select “email” and press OK then delete “Expanded Developer 1”.
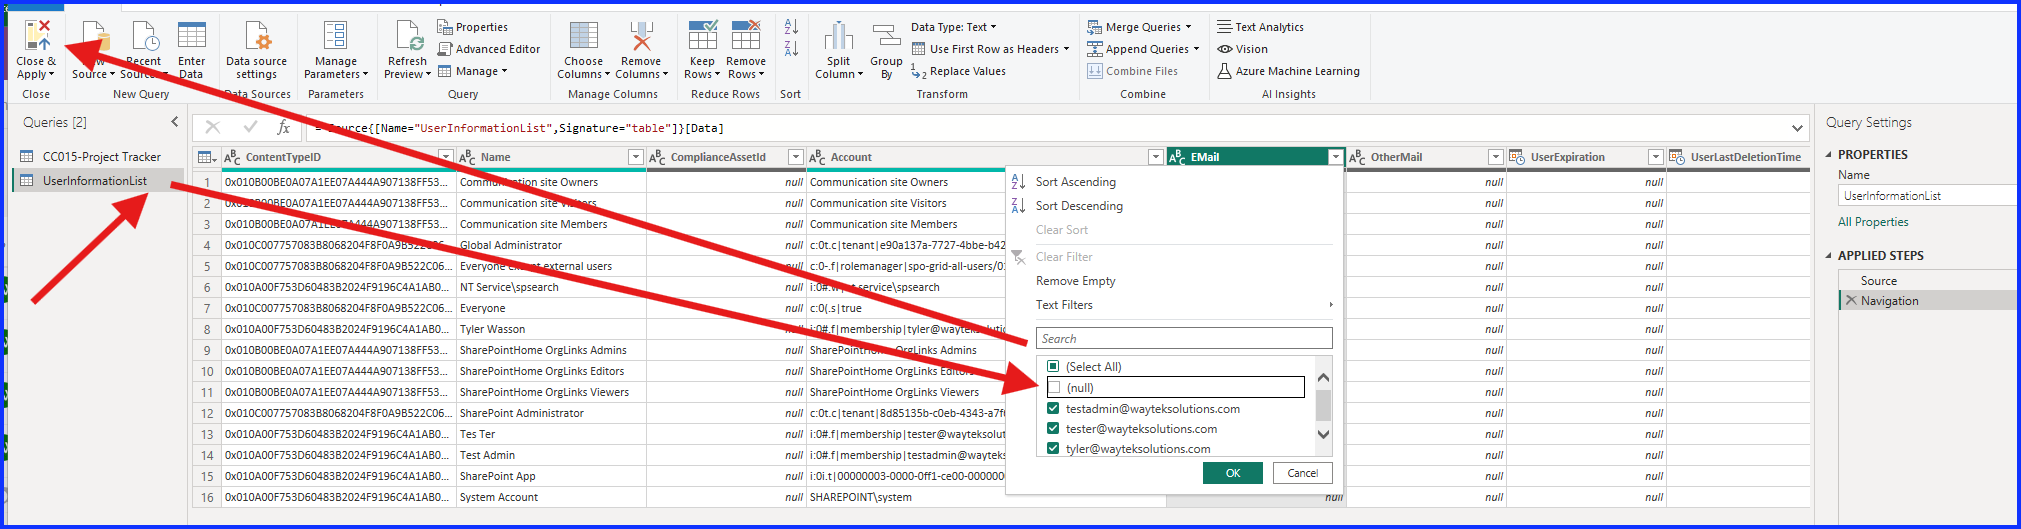
While still in Transform Data, go to the UserInformationList table, go to the “Email” column, select the drop down and uncheck “Null”. This will filter out all the null values in the table in this column. Now you can click on “Close & Apply”.
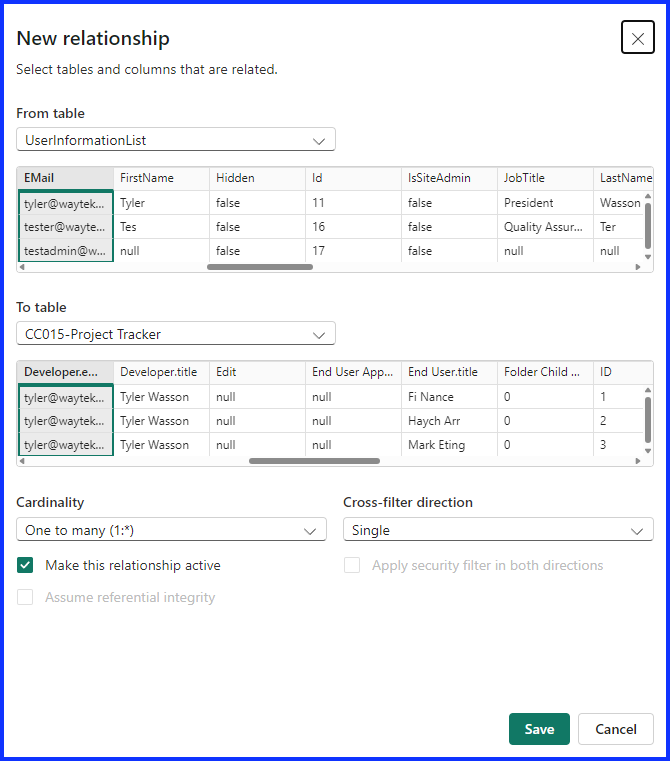
From within the Model view, select the Developer.email field in the project tracker table and drag it across to the Email field in the UserInformationList table.

The New Relationship pop-up window opens and should be automatically filled with both tables aligned at the email address field and with a one-to-many relationship. Select Save.
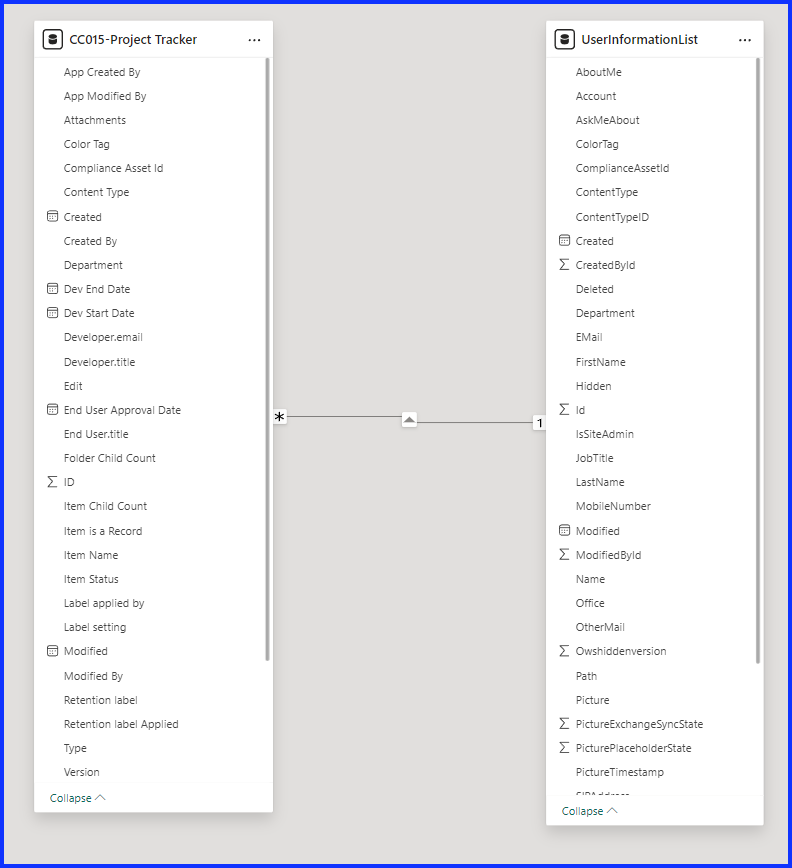
Now you should see both tables and a line connecting each which signifies their relationship.
Now you are ready to use the additional user information in your queries and reports. Give it a try and let me know how you make out in the comment section below.