Intro
If you are new to setting up Microsoft Fabric then this is the post for you. It walks you through step by step on how to setup Fabric capacity from the Azure Portal and then add that capacity to a Power BI Workspace.
From the Azure Portal
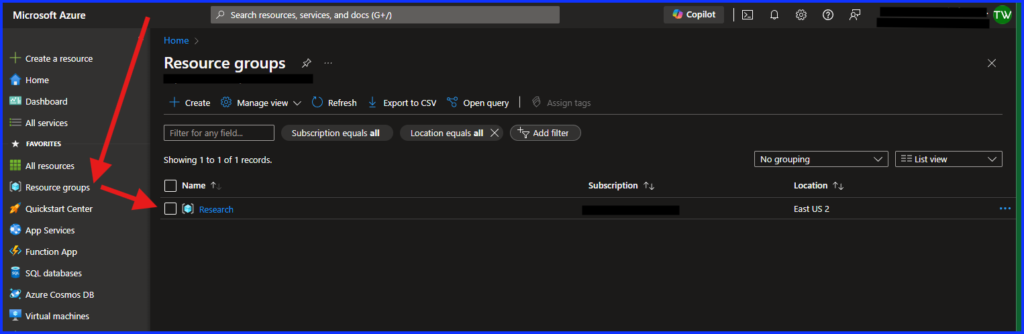
From within Azure Home, either create a new resource group or use an existing one.
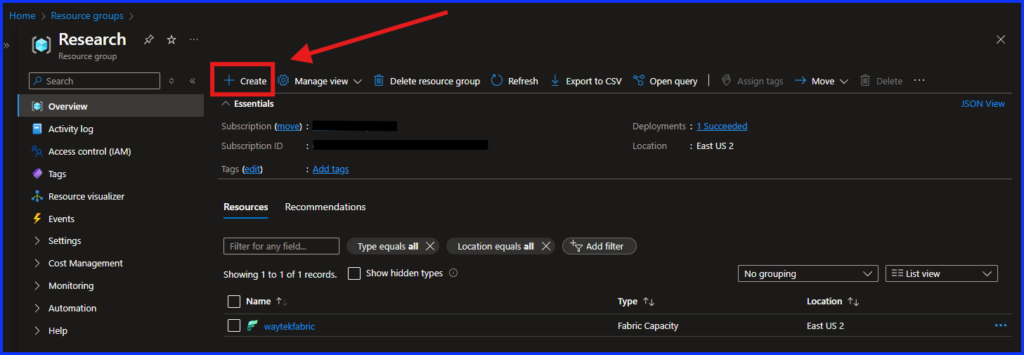
Then from within the resource group create a new service.
Visit YouTube below to see the step-by-step video:
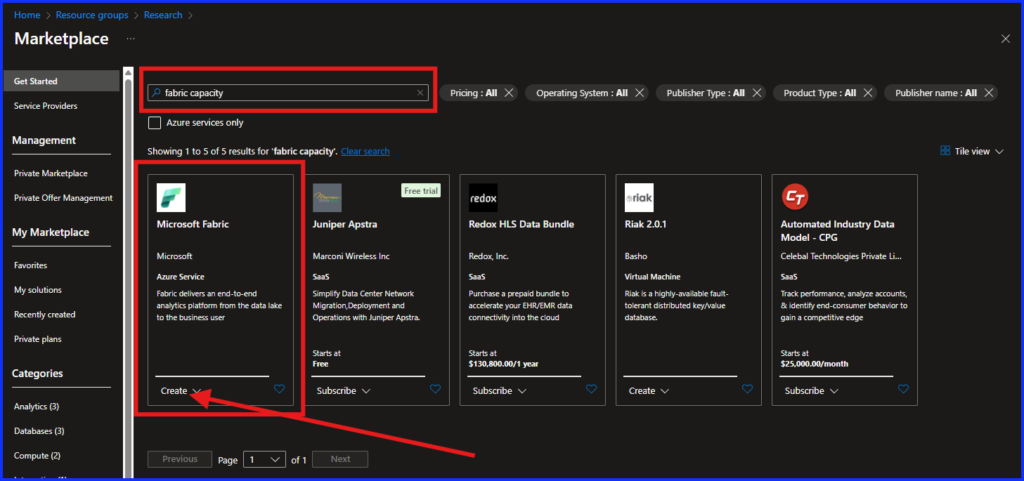
After selecting “Create a New Service”, you will be taken to the Azure Marketplace, then search for “Fabric Capacity” and then select “Create”.
Next, setup Fabric Capacity:
- Select the Azure Subscription you want to use
- Provide the Resource Group if it’s not already added
- Give a name to your Fabric capacity
- Select the geographic region you want Fabric to be located in. Typically, a locale close to you.
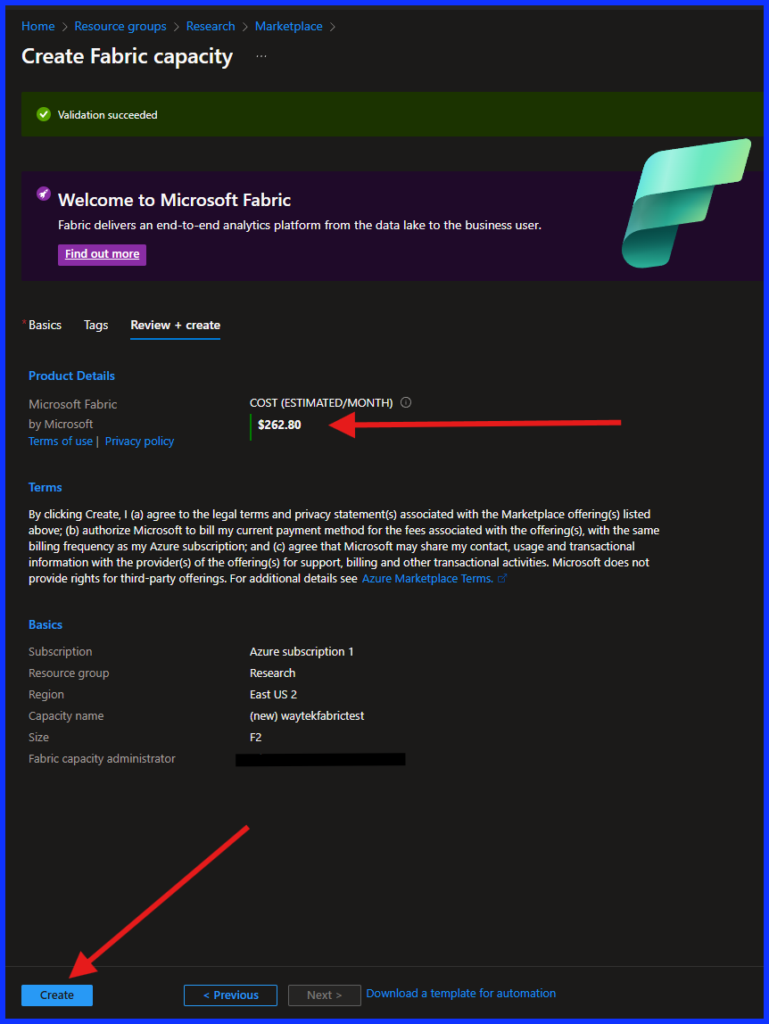
- Select the size of the capacity you will need. You can always change this at any time. I started at F2, the lowest capacity to start. Be careful which one you select as it gets pricey fast. Click here for a link for more information on the capacity and pricing.
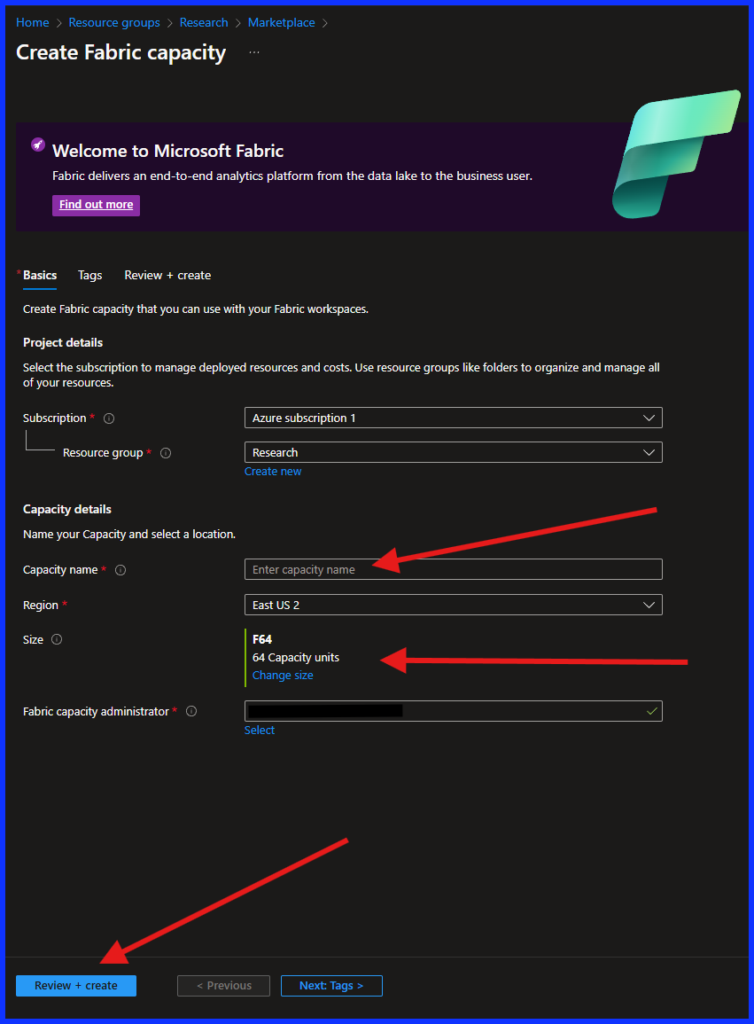
Review your selection details, the estimated monthly cost, then click on “Create”
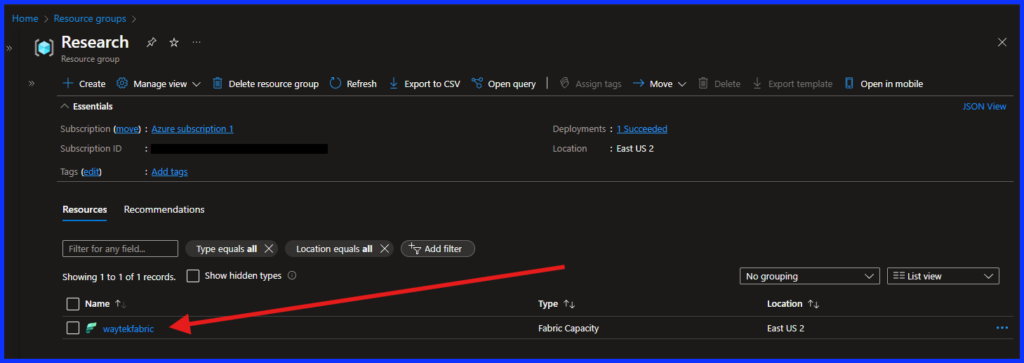
Now from your Resource Group select the newly created Fabric Capacity service.
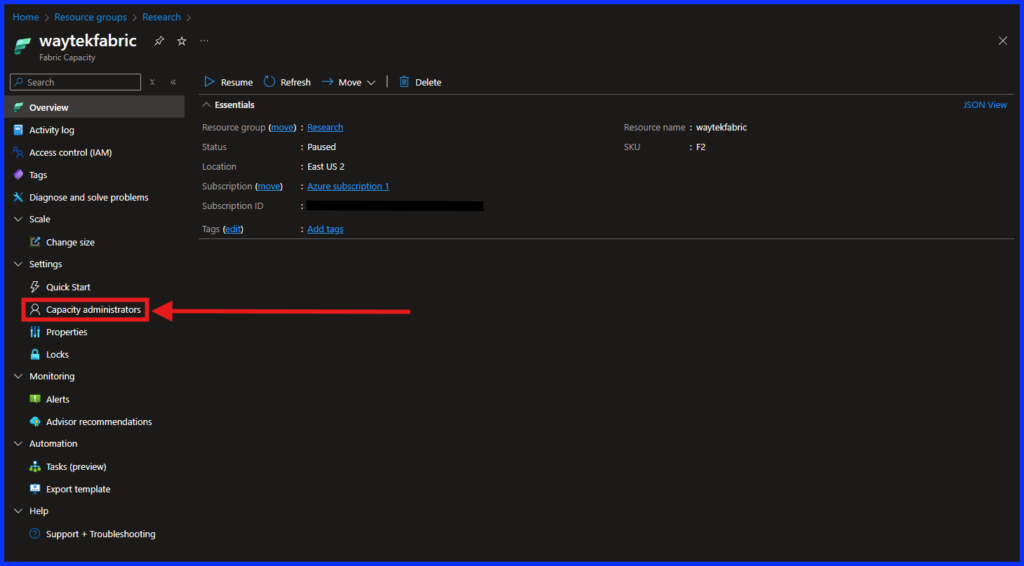
From with the Fabric Capacity service select Capacity Administrators.
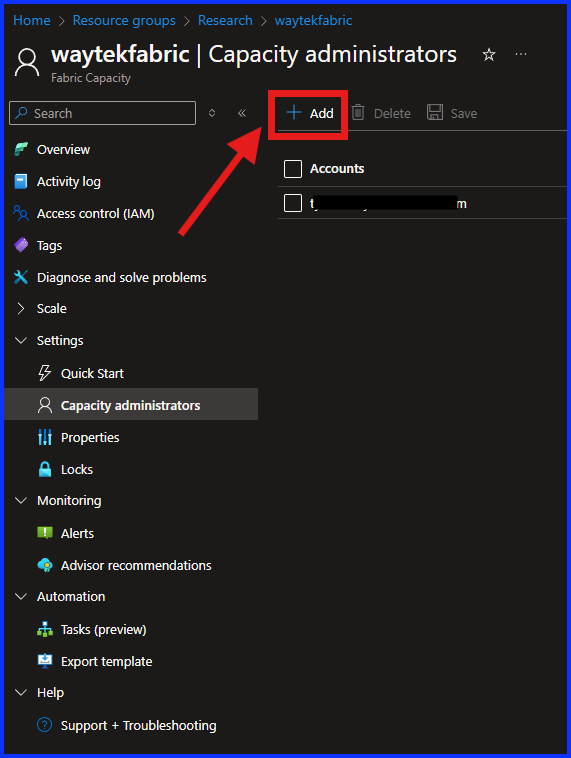
Add the required capacity administrators for your team. These will be people in your team or org who create Power BI Workspaces.
From the Power BI Service
Go to the Power BI Service and then go to Workspaces and select a workspace that you want to add Fabric Capacity to. You can add it one or many workspaces.
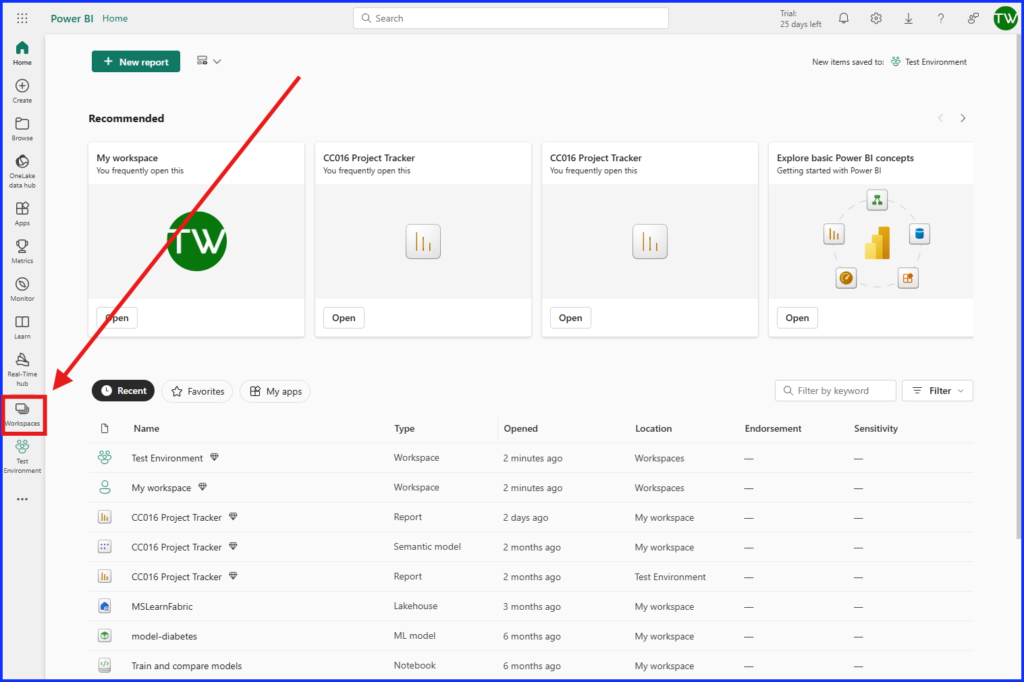
From within the Workspace select the Workspace Settings.

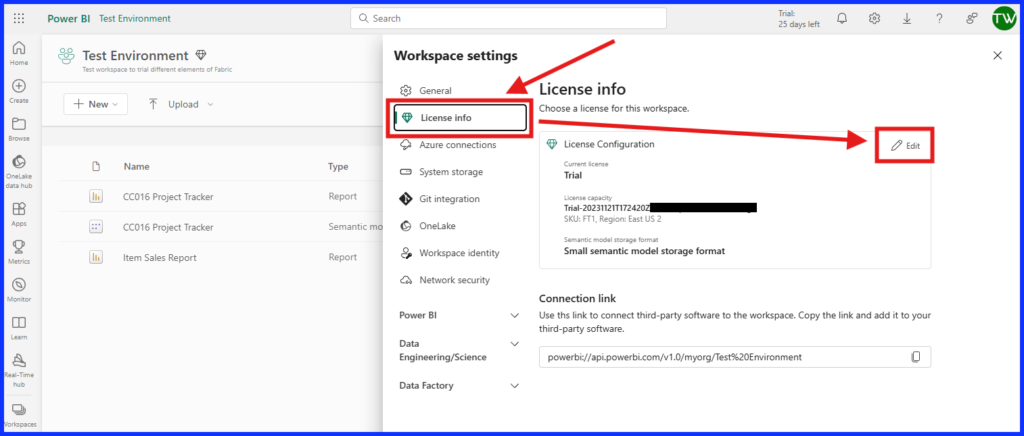
Go to License Info and then select Edit.
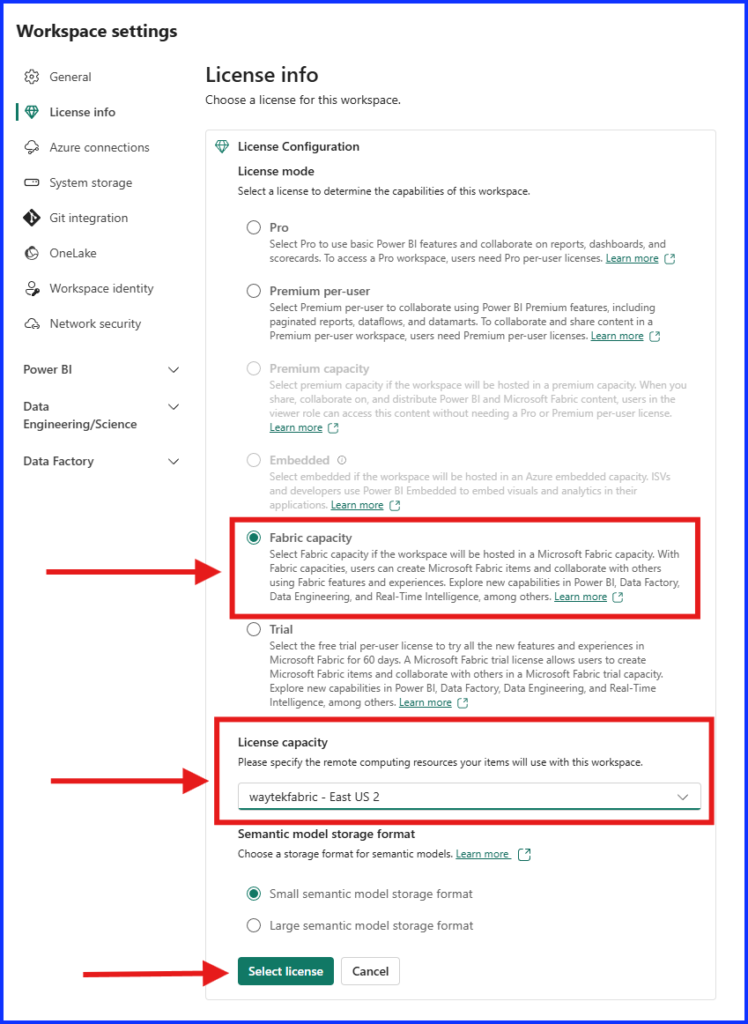
Change the License to Fabric Capacity, select the Azure Fabric Capacity resource that was just created and then click on “Select License”.
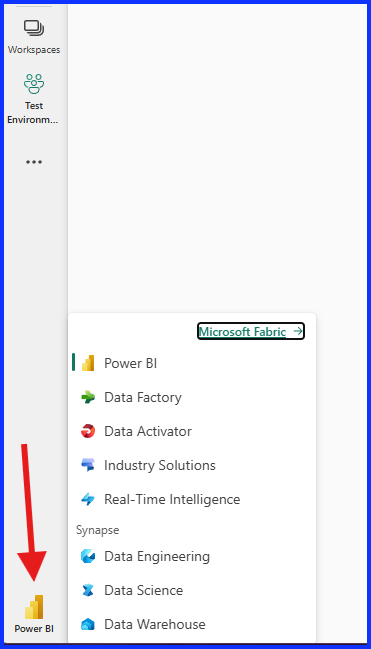
Now from within the Workspace click on the Power BI icon in the lower left of your browser and you should see all the available Fabric Services.
Conclusion
Now that Fabric is configured, your organization can fully harness the power of Microsoft Fabric and Azure, driving efficiency and innovation in your data operations. For more information on Fabric click here.