Today we are going to discuss how to setup a team vacation tracker in SharePoint using Microsoft Lists. Once the list is completed, we will integrate it into Microsoft Teams.
While working at Microsoft, my boss asked me to create a team vacation tracker in Excel to provide visibility and ensure redundancy while members of our team were taking paid time off. I was provided an example tracker file created in Excel and used in the previous calendar year, but it was too much effort to duplicate.
I decided to create a vacation tracker in Microsoft Lists. Microsoft Lists is a web application built on top of SharePoint Lists which work together interchangeably. Let’s walk through how I setup the vacation tracker.
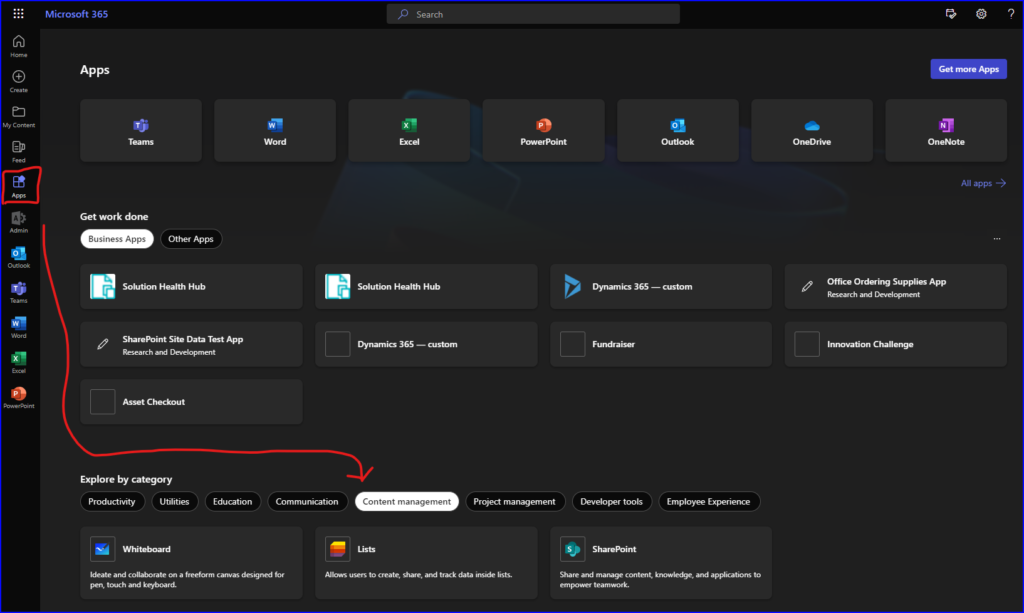
First go to www.office.com, Apps, and then Microsoft Lists:
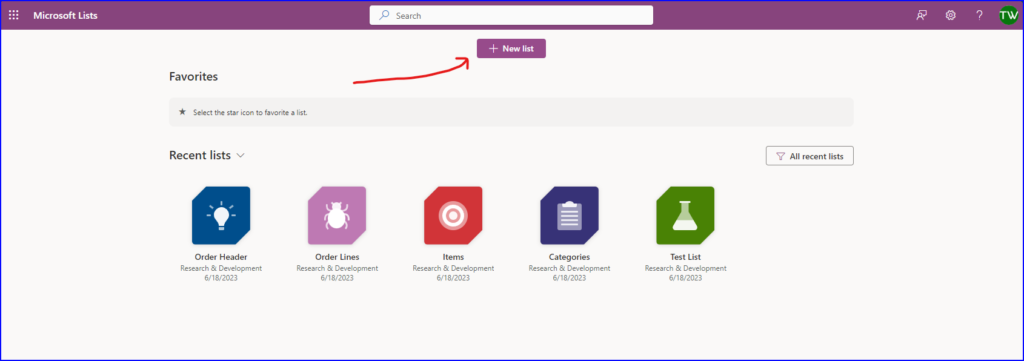
Then from Microsoft Lists home page, create a new list
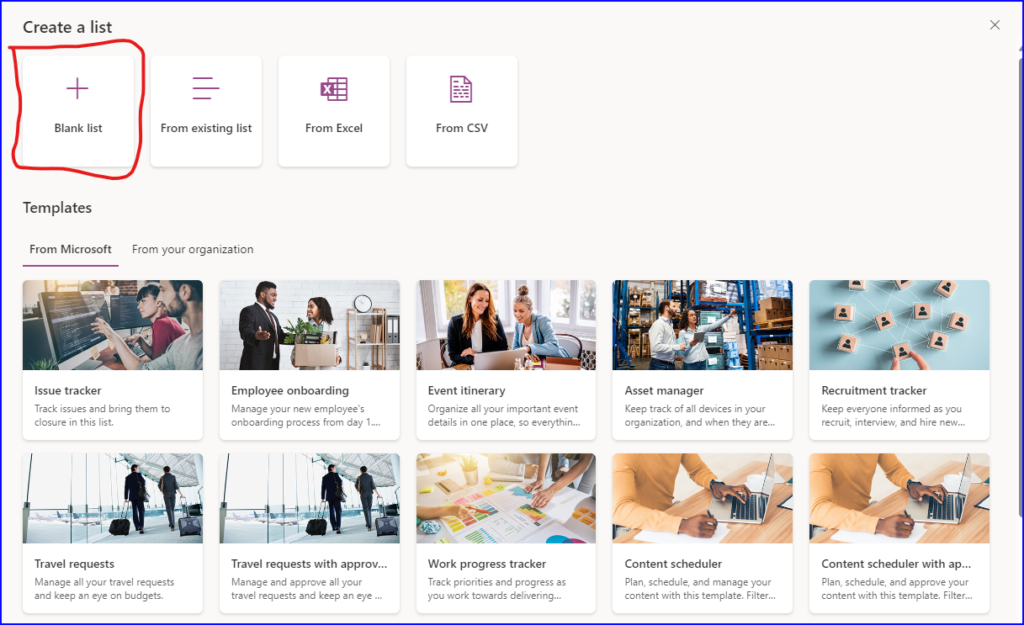
Create a blank list
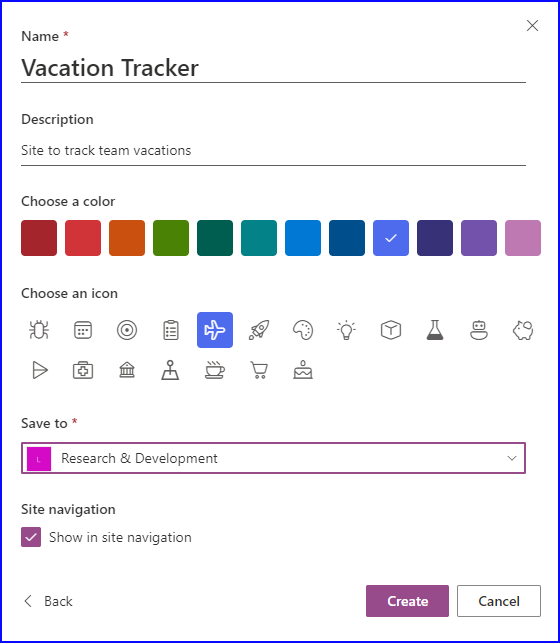
Next you’ll need to provide a name, description, color, icon and location for your list. For the location you will want to save it to your team SharePoint site or Microsoft Team. Check the check box if you want to include the list in the SharePoint site’s navigation, I normally do. If a Team or SharePoint is not available, you can add it to your list (My List) and share the link with your team.
Now we are ready to build our tracker. Your new list will always start with one column called “Title”. This column must have content added in each row, you have the option of renaming it and rearranging it after new columns are added but it cannot be edited.
Right click on the Title column, select “Rename” and change its name to “Vacation Name”.

Then click on “Add Column” and select the “Date and Time” option. Name it “Start Date” and select “Friendly format”, then click “Save”.
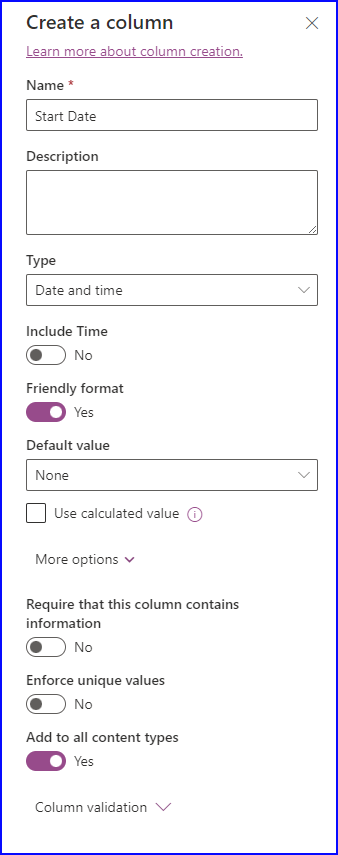
Add another column, select “Date and Time”, call it “End Date” and select “Friendly format”, then click “Save”.
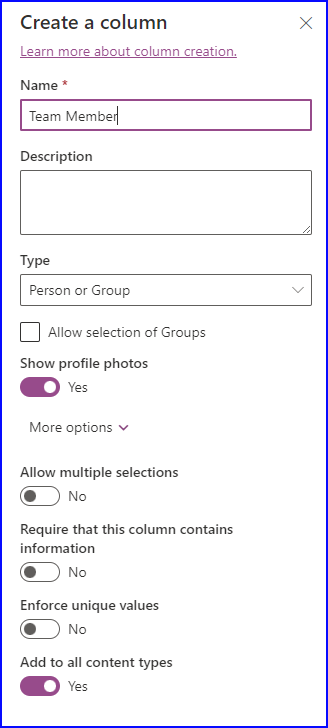
Add another column, select “People”, call it “Team Member”, select “Show profile photos”, then click “Save”.
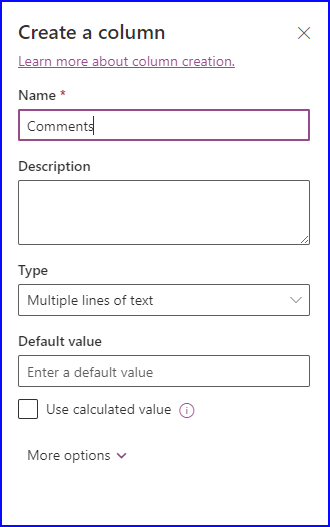
Add another column, select “Multiple lines of text”, call it “Notes”, select “Friendly Format”, then click “Save”.
Now you should have a list that looks like this:

Now we’ll enter some data to the list, I’m using test data as an example. There are two ways to populate the list, first by selecting the “New” button and the second by selecting the “Edit in grid view”. The “New” button will pop open a data entry form and the “Edit in grid view” will allow you to add new or edit the data inline like an Excel table. Use which ever you prefer.

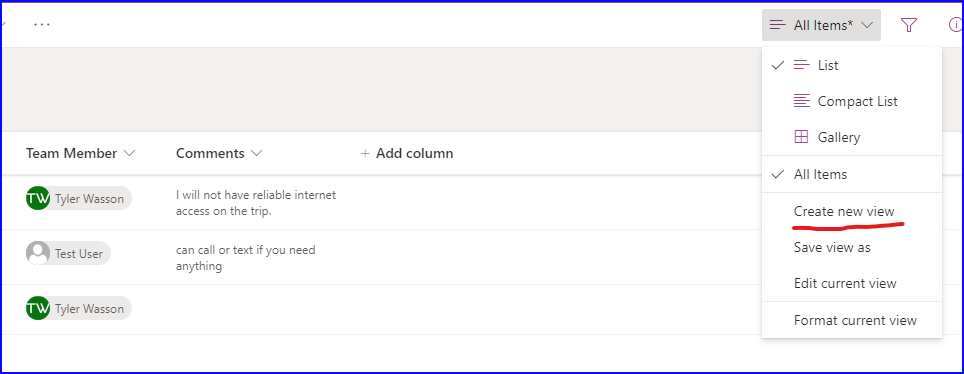
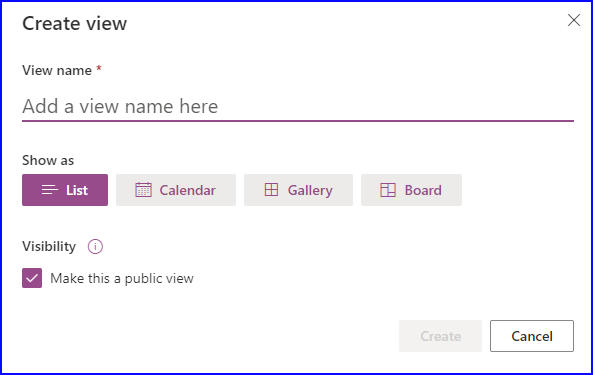
Next we are going to add the calendar view, in the upper right of the web app, click “All items*” and then select “Create new view”.
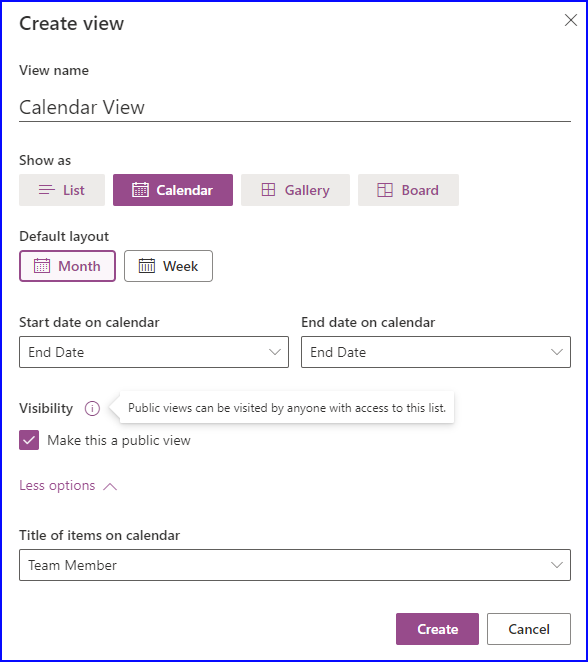
Name the view “Calendar View” and select show as “Calendar”, default layout is “Month”, Start and End Date on calendar as our Start and End Date. Make the view visible to the public so everyone who has access to the list can see the view, and for the title of items on the calendar select “Team Member”.
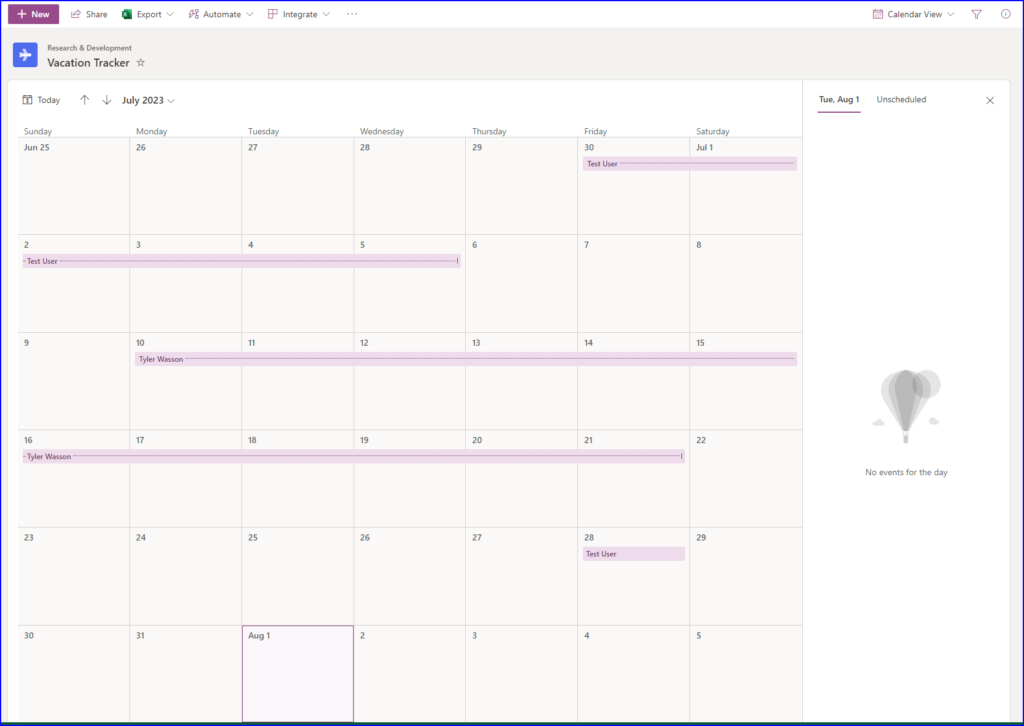
Now you should see your calendar view like the image below.
Now lets look at how we can integrate our list with Microsoft Teams. I assume you already have a Team created, if not here is a link on how to create a Team in Microsoft Teams: Create a team from scratch in Microsoft Teams – Microsoft Support.
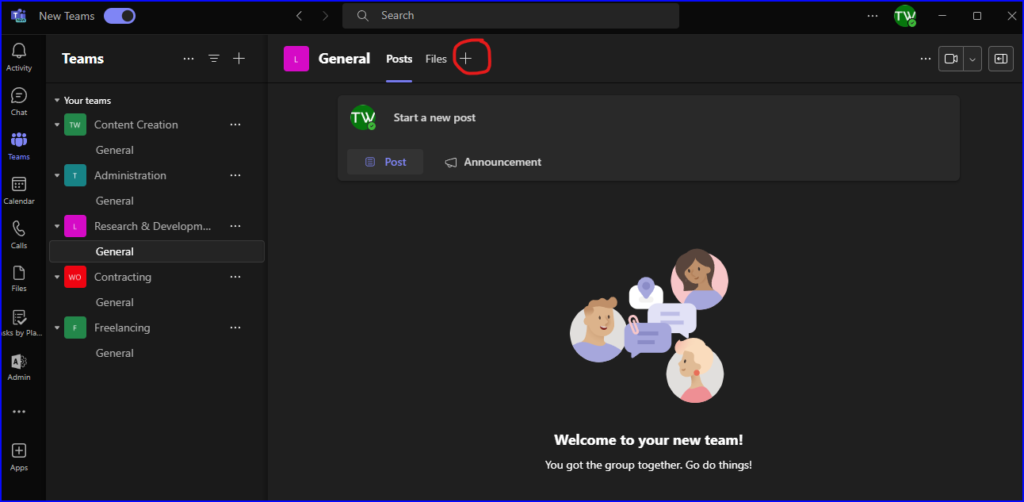
Select the Team and channel you want to add the List to, then select the plus button.
Then search for Microsoft Lists and select it. Then select “Save”, and then select “Add an Existing List”.
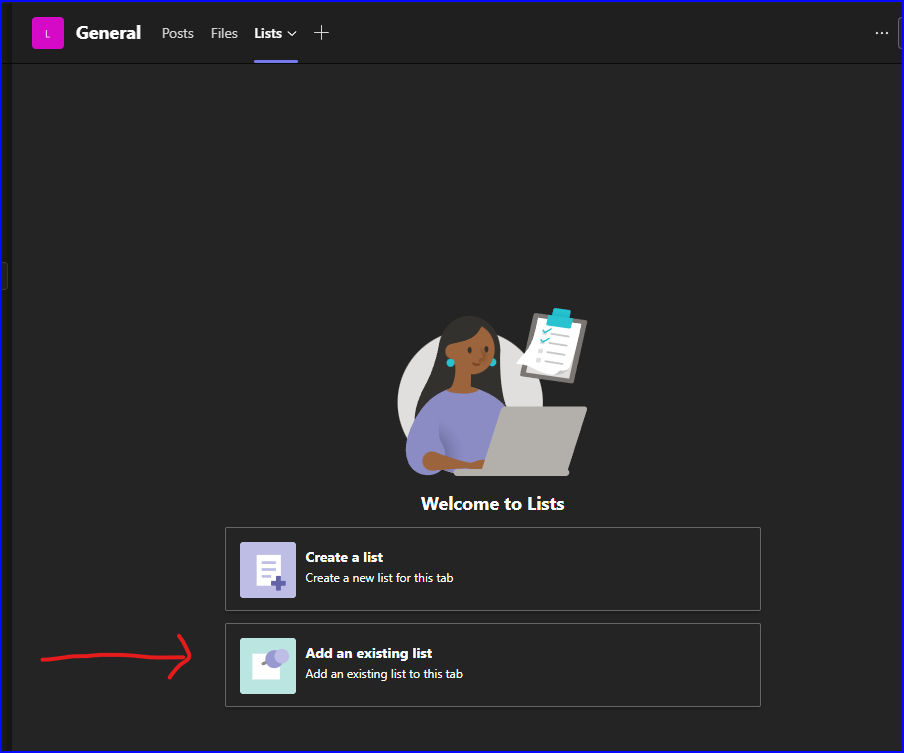
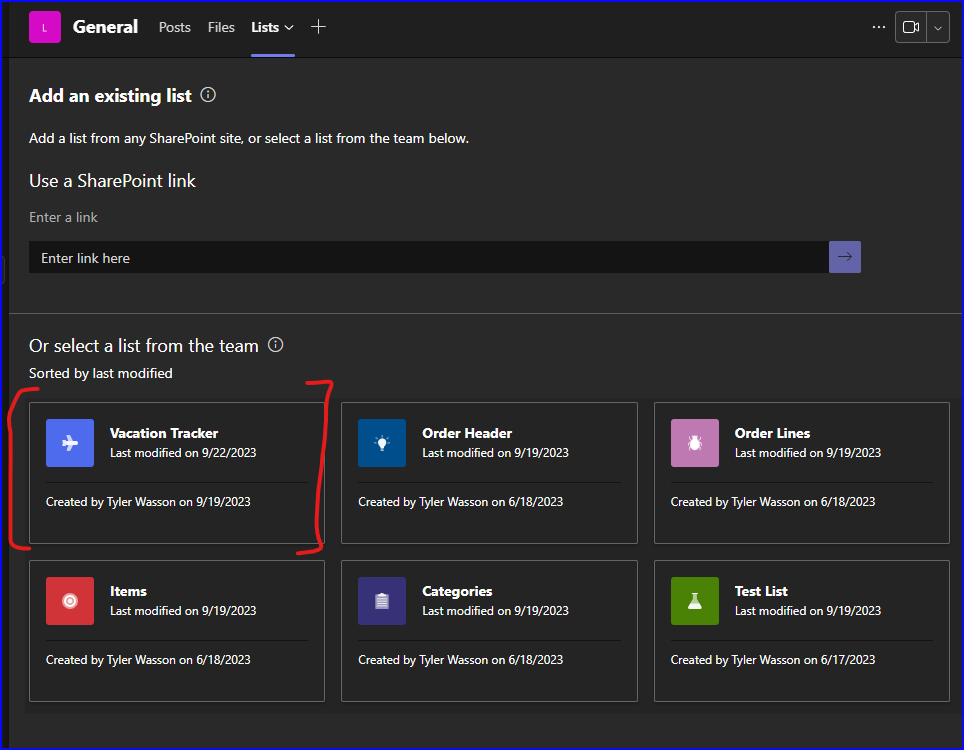
You can either copy and paste the link of the list or select from the available lists below.
Now you list is added to your Team and you can interact with it in the exact same way as in the Microsoft List site or SharePoint site.

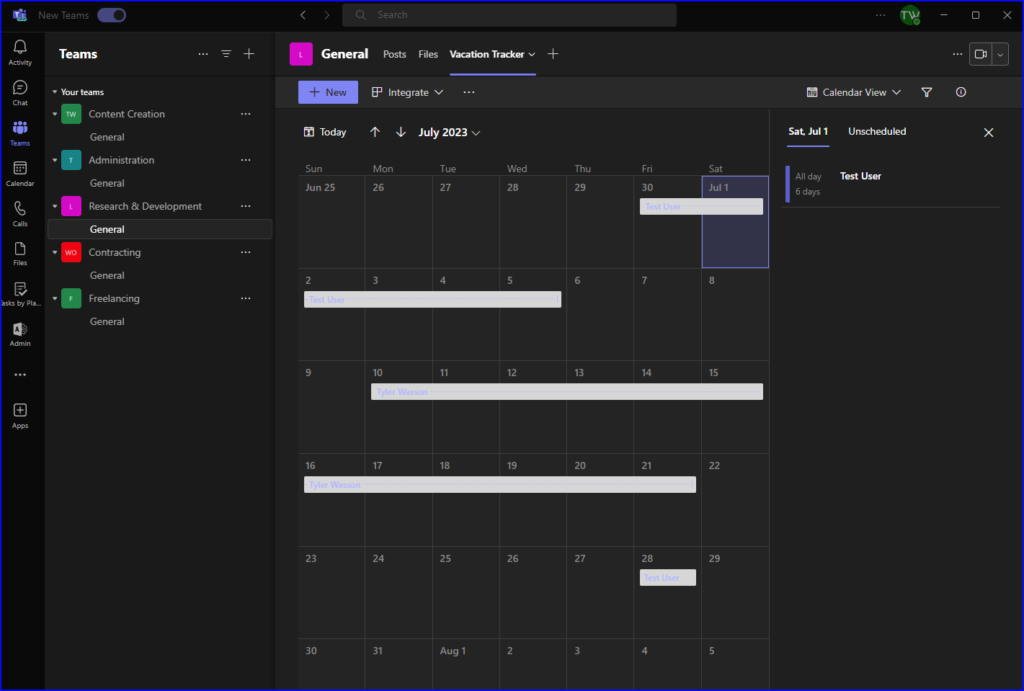
I hope your team likes their vacation tracker as much as my team did at Microsoft.
Click on the link below to see how to add 5 enhancements to your Vacation Tracker.
https://www.tw-waytek.com/5-big-enhancements-to-a-sharepoint-vacation-tracker-in-microsoft-lists


